Difference between revisions of "Manual:VisualEditor/Images"
| [unchecked revision] | [unchecked revision] |
(Tag: 2017 source edit) |
(Tag: 2017 source edit) |
Here we highlight the most important questions when inserting images with VisualEditor.
p
Contents
How do I paste the image on the page?How to insert an image on a page[edit | edit source]
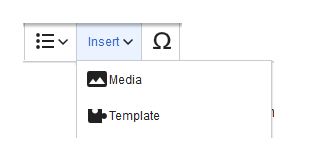
In addition to text, images are probably the most important components of typical content pages. With VisualEditor, the images can be uploaded, inserted and formatted all in one step Here we highlight the most important questions when inserting images with VisualEditor. Pictures are inserted via the menu item Insert > Media:
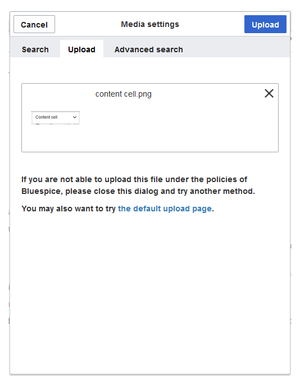
The dialog box Media Settings opens: .
When you upload a new image, the following note greets you:
"If you can are not able to upload this file under the policies of wiki.hallowelt.com(your wiki), please close this dialog and try another method. You can may also want to try the standard default upload page."
You can ignore this notice if your wiki administrator did not create copyright policies. If in doubt, contact your Wiki Administrator for administrator regarding the image usage rights in your organization.
After uploading, you will can edit the necessary image settings: Details, General Settings, and Advanced Settings.
Details[edit | edit source]
Here you can combine pictures with namespaces assign a namespace and categories to a picture. 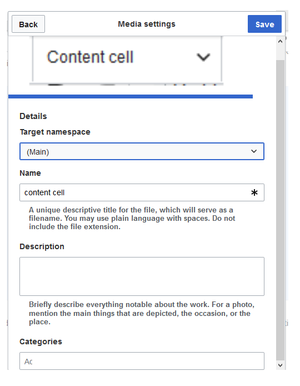
- Destination name spaceTarget namespace: The picture can be assigned directly to a namespace. The access rights of the namespace are also applied to the image. This means that only users with access to the namespace can see view the image and find it on the wiki.
- Name: The name should be chosen in such a way that it can be retrieved later during image search. Choose a name that makes it easy to find the image later during an image search. Or simply leave the current file name.
- Description: The description is mainly useful for photos or infographics where when the image name does not adequately describe the image content.
-
Categories: Here, the picture can be assigned to a category. If the category does not exist yet, it will be saved as desired in the wiki as always. categories.
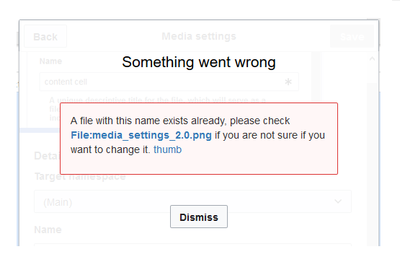
Error message when saving: If the image already exists, an error message is displayed. If you want to overwrite the existing file, you can click on the file name and overwrite the file via the image page in the wiki. This is done via by clicking the "Upload a new version of this file" link in the "File Versions" section. In VisualEditor itself this overwriting an image does not not work:
General Settings[edit | edit source]
Here is the picture on the page under "behind the scenes" described. 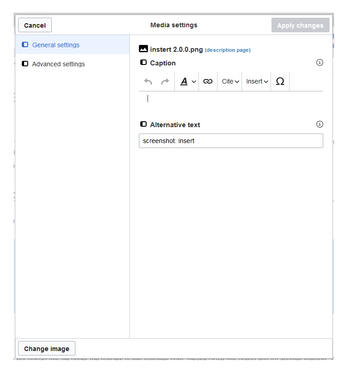 , the image descriptions are added:.
Caption: The caption is used in framed images and thumbnails. Note: If you change an image to frameless and then back to "framed", you must need to re-enter the caption.
Alternate text: The alternate text should be entered for each image since it replaces the image in certain contexts. For example, this so-called "alt" text is used by users who work with screen readers. Screen readers are used by users with visual limitations, but search engines can also read this text. In some business areas, the indication of the "oldalt" text is also required by law. If you are not sure, ask your company accordingly.
Advanced Settings[edit | edit source]
In the advanced settings, you can set the displayed position and image size. Because often photos or screenshots are too big to display in full size on one page. 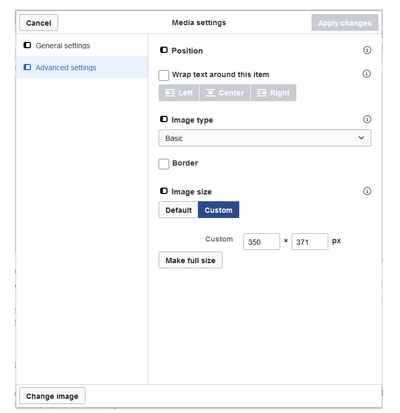 A typical setting here is the following combination
The following settings are possible:
- Position: Do not wrap text (deactivate checkbox) - the image will be displayed below the text. Like the page you are reading.
- Image type: Frameless. For example, the pictures are shown on this wiki page. For the image types: Thumbnail: The thumbnail is always linked to the original image and framed. It shows the label, if it exists. Frameless: Displays the image without a frame. Frame: Outlines the picture and shows the caption if it exists. Simple: Displays the picture without a frame.
-
Image size: Standard (By default, the image will be displayed at a width of 300px). If you switch to Custom, you can specify the width in pixels and the height will be adjusted automatically. On this page, some of the pictures are in standard size and some are custom. Decisive for the size is the readability of the individual screenshots
-
Wrap text around this item:
- Left: The image is displayed on the left side of the text, starting on the first line of the current paragraph.
- Center: The image is displayed centered over the current paragraph.
- Right: The image is displayed to the right of the text, starting on the first line of the current paragraph.
-
Wrap text around this item:
-
Image type: If you insert an image with VisualEditor, the image is usually linked to the Media Viewer. To suppress the link on an image, you must add an empty link attribute to the image tag in the source code:
-
frameless picture with link (standard):
[[File:adult-chair-company-380769.jpg|frameless]] -
frameless picture without link:
[[File:adult-chair-company-380769.jpg|frameless|link=]]
-
frameless picture with link (standard):
| Image type | Output | Description |
|---|---|---|
| Thumbnail | alt=Example of a thumbnail image|centre|thumbnail|This is the caption|link=https://de.wiki.bluespice.com/wiki/Datei:Bild.jpg |
The preview picture shows the image with a standard width of 300px. The width can be adjusted as required.
|
| Frameless | alternativtext=Bild|centre|frameless|link=https://de.wiki.bluespice.com/wiki/Datei:Bild.jpg |
The frameless version shows the picture without a frame. The width can be adjusted as required (here we set the example to 300px).
The caption does not appear below the picture. By default, the image is inserted without text wrapping. It will break up a sentence exactly where it is inserted. By default, the image is centered. However, the image size and position can be adjusted as needed. |
| Frame | alternativtext=Beispiel: Bildtyp frame|none|enframed|300x300px|Dies ist die Beschriftung|link=https://de.wiki.bluespice.com/wiki/Datei:Bild.jpg |
The framed version is similar to the preview picture. Compared to the preview, the magnifying glass symbol is not displayed and the image is inserted on the page full-size.
The size cannot be adjusted. |
| Basic | 300x300px|link=https://de.wiki.bluespice.com/wiki/Datei:Bild.jpg |
The basic version is like the frameless version.
By default, text does not wrap, but the text is separated at the point where the image was inserted. The image is inserted in full width, while the frameless image is inserted in miniature image width (300px). The size can be adjusted. |
-
Iamge size:
- Standard: sets the image widht to 300px.
- Custom: allows setting a custom size.
- Make full size: resets the size to the actual image size.
Where do I save the image[edit | edit source]
You can easily save pictures and files in the general namespace (pages). If you have created additional namespaces, you can also save images in these namespaces . Prerequisite are the corresponding if you have the necessary access rights to the respective namespace. If pictures are to be generally usable and are not subject to access restrictions, pictures are well kept should be accessible by all users, you can save these pictures in the main namespace (pages).
How big is my picture?[edit | edit source]
How big should the image be so I can use it on a wiki page? The question depends on what should be done you need to do with the picture. Often, a picture will be displayed as a thumbnail small on the page first. The picture itself can then be viewed in its original size.
If you want to create PDF manuals via your Wiki PDF, the images should be uploaded as large as possible. However, it is important to remember that the files will not get too large for your wiki pages to load quickly. Images over 100 KB are rather unusual on a web page, while images under 20 KB are often not sharp enough when printing on paper. If you create documentation with your wiki, which is also printed out as a manual, then you should consider a suitable strategy.
How do I change an already uploaded image?[edit | edit source]
In the editing mode of the page, it is possible to edit the image with a double-click. Use the "Change image" button to exchange the image accordingly.
If you want to use a new version of the same image, open the "Special:Upload file" page in a new browser tab (so you do not lose any changes on your wiki page). There you can save already existing pictures with or without warning under the same name again. The original image is kept as a version.
Technical Details[edit | edit source]
BlueSpice extension: BlueSpiceInsertFile
Technische Details[edit | edit source]
BlueSpice Erweiterung: BlueSpiceInsertFile