InsertImage
-
- Last edited 7 years ago by Lsireta
-
-
- This page is a first draft
Contents
What is InsertImage?
InsertImage is a tool developed by Hallo Welt! which lets you upload, insert and edit images using a pop-up window. Inserting images with BlueSpice is much easier than with MediaWiki because you no longer have to change to a special page to upload them.
Where to find the function?
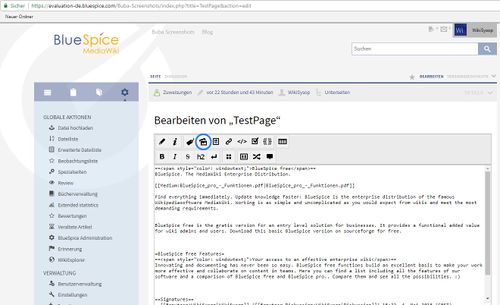
"InsertImage" can be accessed using the button ![]() , when you are in the edit mode.
, when you are in the edit mode.
You can open the dialogue when you are using the WYSIWYG editor as well as in the standard wiki code editor.
The functionality of InsertImage
First, go to the place in the text field where you want to insert the image and then click on the button (see above) to access the tool. Screencast
Inserting images
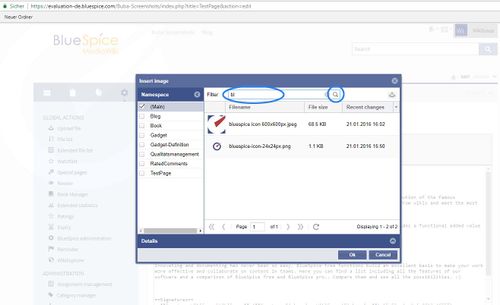
Search and insert existing images:To insert images to your page, choose an image from the preview list given by InsertImage. You can restrict the images displayed here by typing the initial letters into the filter field. For example, when you type "Hi" into the filter field and wait a moment, all images which start with "Hi" will be shown. The image selected will be shown in the right part of the window.
Add adjustment, decoration, size and description: Now you can make further adjustments in the tab "Details", for example set the justification of the image, or insert it as a preview (then it will be displayed very small and with a thick grey border). You can also change the size of the image. Note that the picture itself is not made any smaller, only its appearance in the article!
Alternative text is the caption.
Linking: Add links to your image so that in the view-mode a reader of the article will be linked to the connected article you choose. If you want set more than one link on the picture please use the function Image Map.
Have you made all the adjustments you want to make? Then put the image into the article with "ok". Then the picture is incorporated in the wiki code.
Uploading images
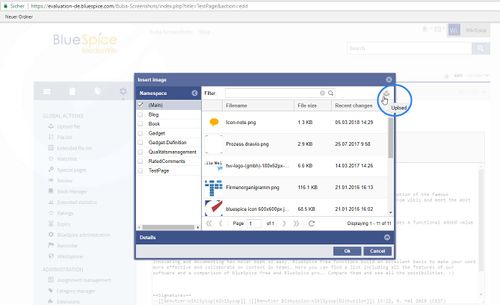
If uploading an image, click on upload.
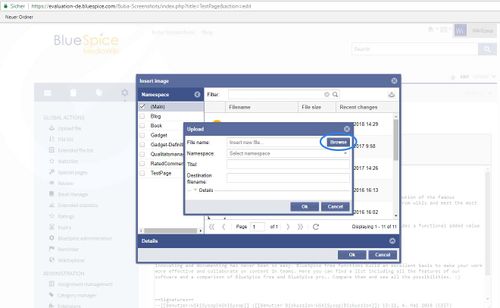
Then: browse.
You can choose the image you want here.
Make sure you enter the image's licence and, if desired, a short description. This will save you tedious research into copyright later on.
It is very useful if you insert a category for the image as well so you help to structure the content and to find images quickly.
Then you need to put the image into your wiki with the button ok. After this, you can insert it into pages as described above. Do not forget to choose the picture you want again!
Note: If the image preview does not automatically update after uploading an image, then you can update it by leaving the "InsertImage"-dialogue and opening it again.
Tips for working with InsertImage
- Do not be shocked if a picture appears somewhere you did not expect when working with the WYSIWYG editor. Everything will be shown as you wish in the preview, or at the latest when you save.
- Choose explicit names for your files before you upload them. The file name should be a description of the image, for example Emden-spanning-network.jpg rather than Image123.jpg. This will help you and others to find the image later.
- If there is an image with this name already there, the dialogue window will let you know and ask if you want to replace it. You can confirm the upload with the button "ok" or stop it with the button "cancel". If you click on the ok button, the existing image will be replaced. The version history of the image will show this change.
Licensing
You can define the license selection on the MediaWiki page Mediawiki:Licenses (see documentation at MediaWiki.org and an example).
Classical "insert image" with MediaWiki
Click here for the MediaWiki instructions.
See also
Our reference page.


