Difference between revisions of "Setup:Installation Guide/System Preparation/Windows/PHP 7.3"
← Setup:Installation Guide/System Preparation/Windows/PHP 7.3
| [unchecked revision] | [unchecked revision] |
m (Tag: 2017 source edit) |
m (Tag: 2017 source edit) |
Contents
|
|
The source code of BlueSpice is based on the scripting language "PHP". It must be installed on your server in order to operate BlueSpice. The steps listed here are required. |
Introduction[edit | edit source]
PHP is not installed with a "classic installation package", but the sources are downloaded and integrated in IIS via the previously installed PHP Manager.
Downloading PHP[edit | edit source]
In your browser, open the official download page for Windows on php.net (1). Find the latest version 7.3.x (2) 64-bit (3) Thread-Safe (4) and download it here (5):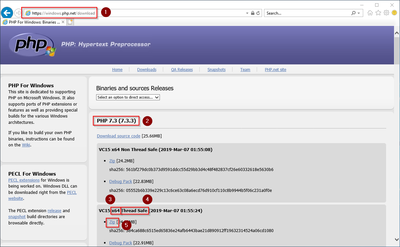
Follow the download instructions.

|
Please note that the download on your Windows Server with Internet Explorer will only work if you have configured the Internet Explorer Advanced Security Settings in the Server Manager. Please refer to the technical documentation from Microsoft. |
|
|
The following is PHP version 7.3.3 and is only an example of the latest version 7.3.x that you can download at the time of your installation. |
Unzipping the ZIP archive[edit | edit source]
Unzip the ZIP archive just downloaded into a useful system path on your hard drive.
|
|
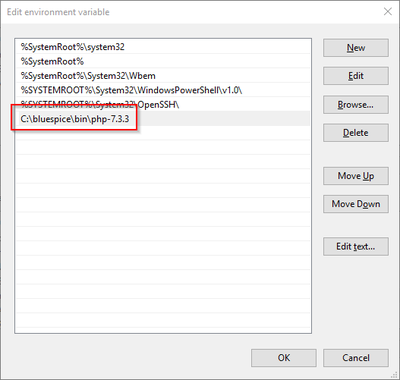
This documentation assumes the recommended folder structure.
For this reason PHP will be unpacked into the folder C:\bluespice\bin\php-7.3.3. If you have a different folder structure, you must adapt these paths accordingly. |
Setting the environment variable[edit | edit source]
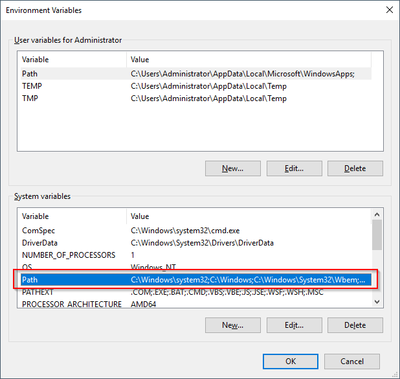
In order to use PHP easily on the command line of Windows, it is necessary to configure an environment variable in Windows accordingly. To do this, perform the following steps:
Enter the key combination Windows + R.
In the following dialog enter "SystemPropertiesAdvanced.exe" (1) and confirm with OK (2):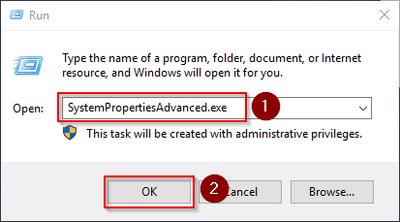
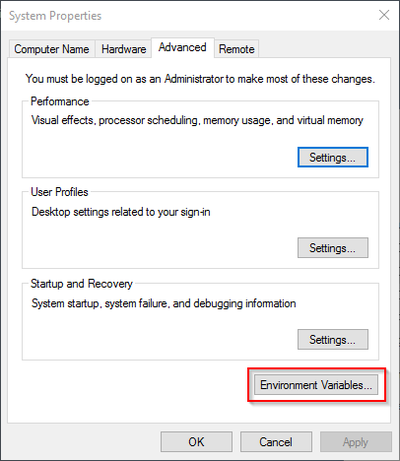
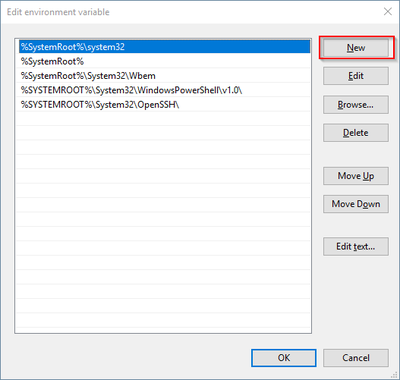
Close all newly opened windows one after the other by clicking on "OK".
Checking the environment variable[edit | edit source]
To make sure the environment variable is set correctly, perform the following steps:
Enter the key combination Windows + R.
In the following dialog, enter "cmd" (1) and confirm with OK (2):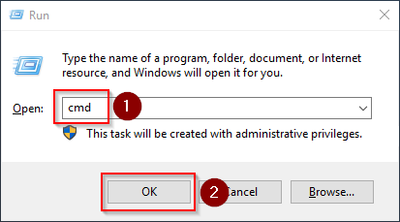
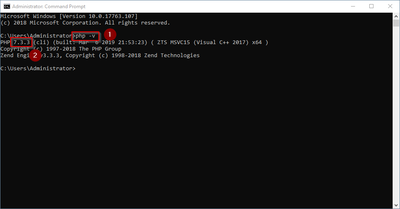
If this is not the case, then the path to the php.exe file in the environment variables was incorrectly specified.
Configuring the IIS for PHP[edit | edit source]
In the following steps, PHP will be included in IIS and IIS will be configured to provide a working basic setup:
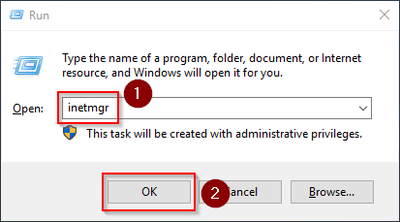
First, call IIS Manager. To do this, enter the key combination Windows+R.
In the following dialog, enter "inetmgr" (1) and confirm with "OK" (2):
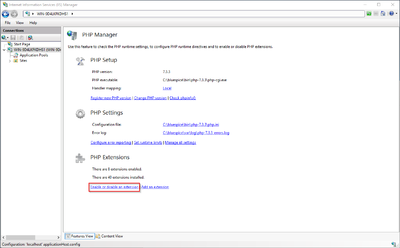
In the left pane, select your server name (1) and then double-click "PHP Manager" (2):

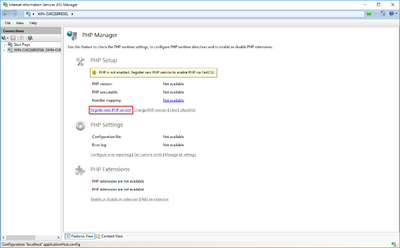
In the following window select the browse "(...)" button:
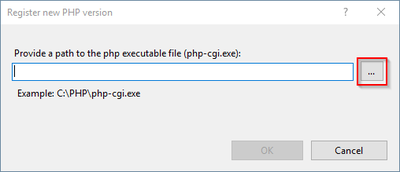
To manage the PHP settings in the next window:
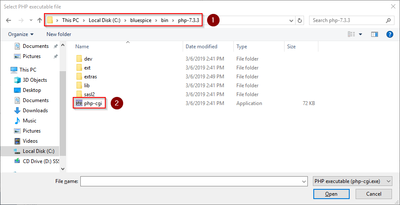
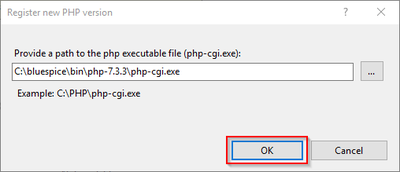
Change to the path to which you previously unzipped PHP (1), mark the "php-cgi.exe" (2) and confirm the dialog with "Open" (3):
Confirm again with "OK":
Activate the item "Production machine" (1) and select a path and a file of your choice where PHP should save its log (2). Confirm with "Apply" (3):

|
|
This documentation assumes the recommended folder structure. If the path you specify here does not yet exist, please create it before clicking "Apply". |
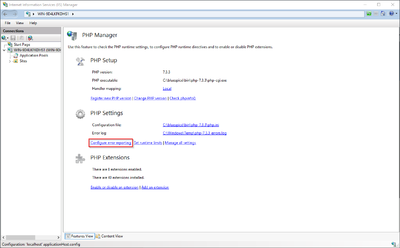
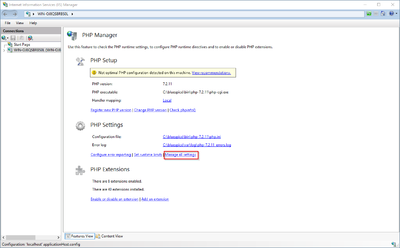
Click "Manage all settings":
Adjust the following settings:
{| style="align: center;"! style="border: 1px solid #000; padding: 5px;" |Name ! style="border: 1px solid #000; padding: 5px;" |Value ! style="border: 1px solid #000; padding: 5px;" |Section |- | style="border: 1px solid #000; padding: 5px;" |date.timezone | style="border: 1px solid #000; padding: 5px;" |"| Name | Value | Section |
|---|---|---|
| date.timezone |
"Europe/Berlin"
oder entsprechend Ihrer Zeitzone |
| Date | |
| max_execution_time |
| 600 | PHP | |
| post_max_size |
| 128M | PHP | |
| upload_max_filesize |
| 128M | PHP |
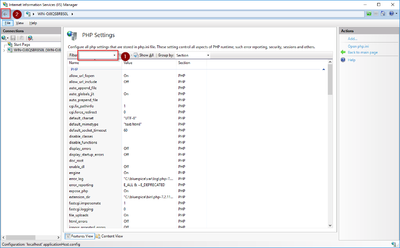
To find these options faster, you can also use the filter (1). Go back afterwards (2):
In the main window, click "Enable or disable an extension":
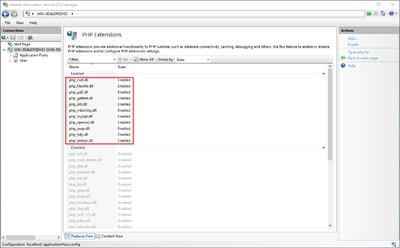
Make sure that the following extensions are enabled:
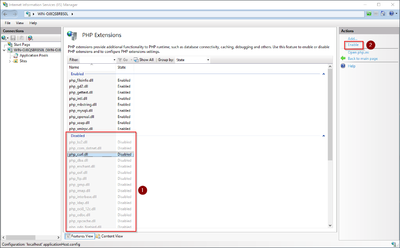
To activate an extension, select it in the "Disabled" section (1) and activate it by clicking on "Enable" (2):
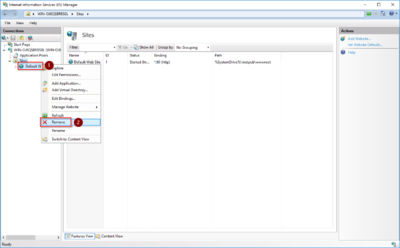
In the next step, expand the tree on the left until the "Default Web Site" becomes visible:
Right-click (1) and then click "Remove" (2):
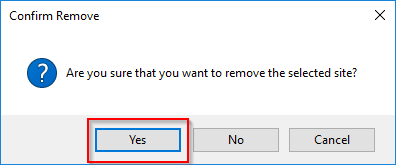
Confirm the following dialog with "Yes":
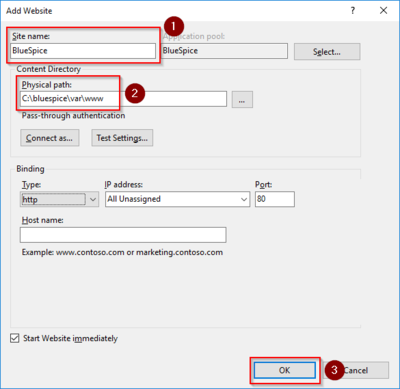
Right-click on "Sites" (1) and click on "Add Website" (2):

Enter the site name "BlueSpice" (1) and select the path on your server where your BlueSpice installation will be located later (2). Confirm with "OK" (3):
|
|
This documentation assumes the recommended folder structure. If the path you specify here does not yet exist, please create it before clicking "OK". |
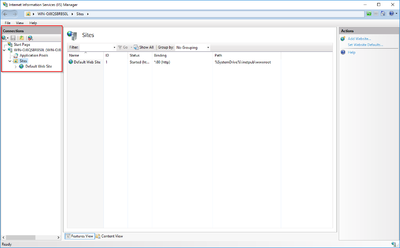
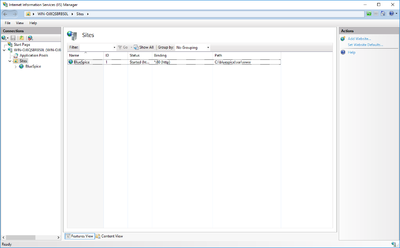
The new page is now listed in the IIS overview page:
Next step[edit | edit source]
If you have successfully completed all these steps, you can proceed to the next step " MariaDB".