Difference between revisions of "Setup:Installation Guide/System Preparation/Windows/Python"
← Setup:Installation Guide/System Preparation/Windows/Python
| [unchecked revision] | [quality revision] |
m (Tag: 2017 source edit) |
m (translation is aligned with current DE version) (Tag: Visual edit) |
|
|
Python with the extension Pygmentize is needed for the rendering of the MediaWiki extension "SyntaxHighlight", which is part of BlueSpice. The steps listed here are required. |
Downloading Python[edit | edit source]
In Internet Explorer, open the official download page (1). Switch to the download page for Windows (2).
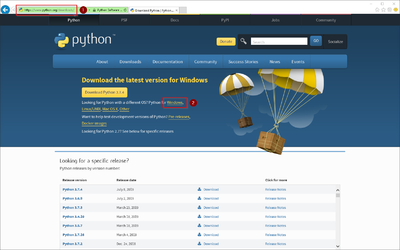
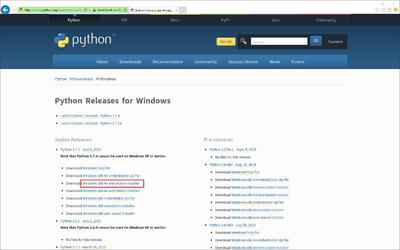
Select the "executable installer" (64-bit):
Follow the further download instructions and download the installation package to your hard drive.

|
Please note that the download on your Windows Server with Internet Explorer will only work if you have configured the Internet Explorer Advanced Security Settings in the Server Manager. Please refer to the technical documentation from Microsoft. |
|
|
In this guide, Python is used in version 3.7.4 as an example. You can download the latest version at the time of installation. |
Installing Python[edit | edit source]
Open the just-downloaded python-3.7.4-amd64.exe file.
Start the installation by clicking "Next".
Confirm both checkboxes (1) and then click "Customize installation" (2): 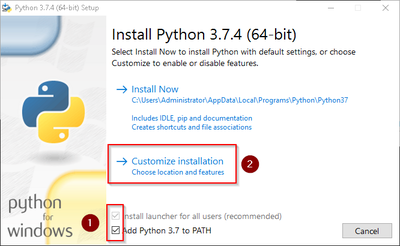
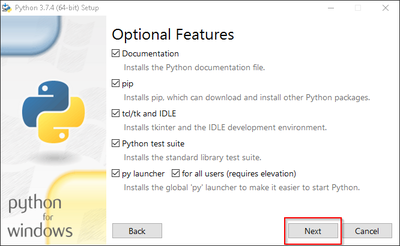
Confirm the next step with "Next":
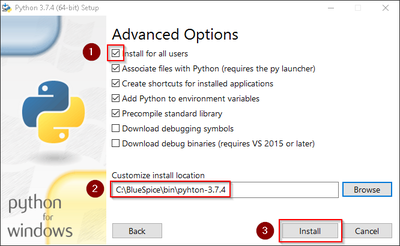
Make sure to install Python for all users (1) . Choose an appropriate path, if possible without spaces and special characters (2), and start the installation by clicking "Install" (3).
 {{Template:Hint|text=
|
|
This documentation is based on the folder structure |
| . For this reason, the default path for Python installation is set to the folder C:\bluespice\bin\python-3.7.4. If you have different requirements, you must adapt these paths accordingly. |
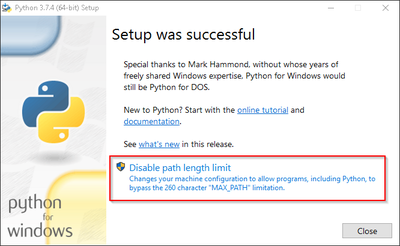
After installation, please disable the limitation of the path length (260 characters).
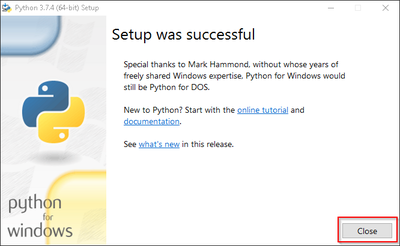
Finish the installation by clicking "Close":
Installing Pygmentize[edit | edit source]
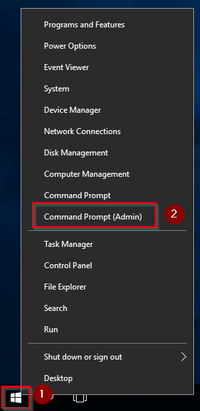
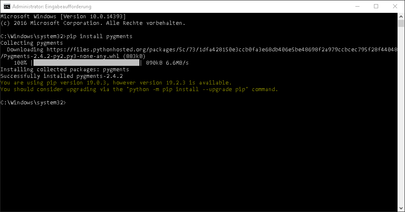
Open the command prompt with admin permissions. To do this, right-click "Start" (1) and select "Command Prompt (Administrator)" (2):
Enter the command "pip install pygments" and wait for the process to finish:
Next step[edit | edit source]
If you have completed all steps successfully, you can delete the previously downloaded file "python-3.7.4-amd64.exe" from your hard drive. If you install BlueSpice pro, go to the next step "PhantomJS". If you install BlueSpice free, you can now continue with Installing BlueSpice.