Difference between revisions of "Manual:Extension/BlueSpiceNamespaceManager"
| [unchecked revision] | [quality revision] |
(Tag: Visual edit) |
Contents
The Namespace manager allows a user with administrative rights to create, delete and rename namespaces and to change the settings of these namespaces. The interface for the user manager is provided by the extension BlueSpiceNamespaceManager.
Where to find the NamespaceManager?Contents
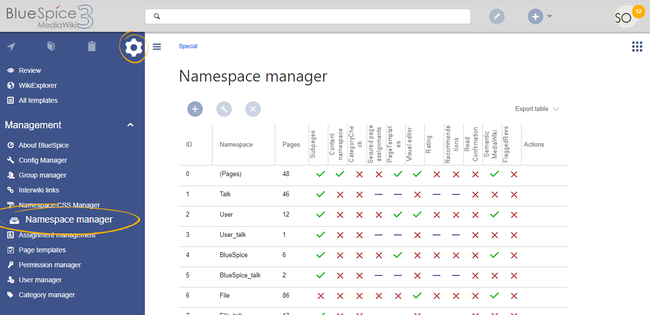
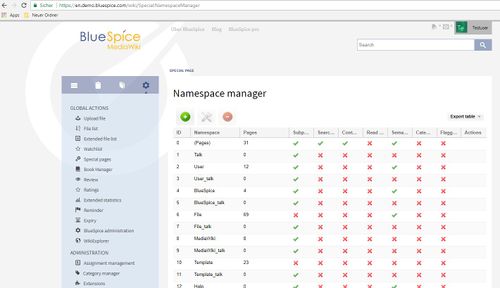
NamespaceManager displays information about the namespaces used in a table. It also lets you change the settings and create new namespaces.
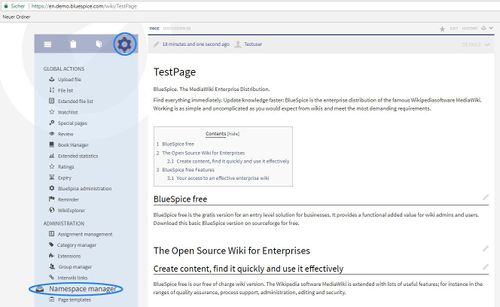
Accessing the Namespace manager[edit | edit source]
Firstly, you need to have administration permissions in order to call up NamespaceManager. If you have these permissions, you can find the link"NamespaceManager" in the left hand navigation bar under "Admin". Click on the link and you will be taken to the administration page.
Creating a namespace[edit | edit source]
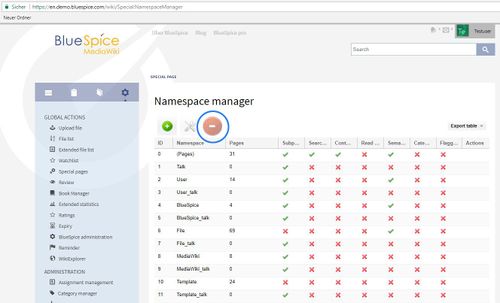
You can see all the existing namespaces listed in the table.
This button  lets you add a new namespace. A namespace's name can contain from 2 to 100 characters. You can choose any of the characters [A-Za-z0-9_ A-Za-z0-9_] and all the accents and umlauts in the UTF-8 character set.
Editing a namespace[edit | edit source]
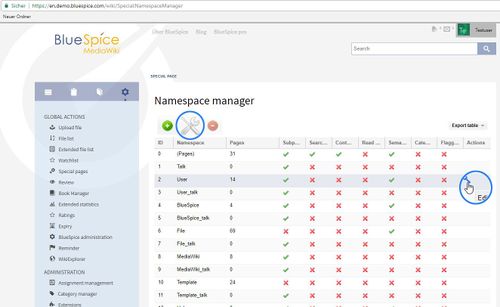
Choose a namespace and click on this icon to edit:
The following definitions can be made for namespaces:
-
-
-
- has subpages: Allows the use of subpages. These are pages which maintain their hierarchical relationship.
- in standard search: this automatically includes the namespace when searching. These standard settings can be overwritten in the user preferences. The question of whether a page will be shown as a match to a search depends on its readability, not on the search settings of the namespace.
- content namespace: Contents from this namespace will be prioritized in the search results.
- FlaggedRevs: This choice is only possible if the package [teamwork] is installed, because teamwork includes the extension FlaggedRevisions. If you tick the box, FlaggedRevisions will be activated for this namespace.
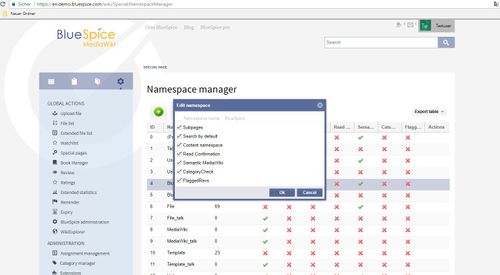
Note: it is not possible to change the name of a discussion namespace, as this is associated with the corresponding custon namespace.
DeletingTo create a namespace:
- Click the "Plus" icon at the top of the page. A dialog opens.
-
Enter the name for the new namespace and select the namespace options.
-
You can activate the following options:
- Subpages: namespace can contain subpages (MediaWiki functionality)
- Content namespace: needs to be checked if users will create wiki pages in this namespace (MediaWiki functionality). See also mediawiki.org/wiki/Manual:ContentHandler.
- The remaining options activate a number of extensions for the namespace: CategoryCheck, Secured page assignments, PageTemplates, Visual editor, Rating, Recommendations, ReadConfirmation, Semantic MediaWiki, Approval.

The corresponding talk namespace for the new namespace is automatically created. The ID of each namespace is assigned automatically based on wiki settings and existing namespace IDs.
Editing and deleting a namespace[edit | edit source]
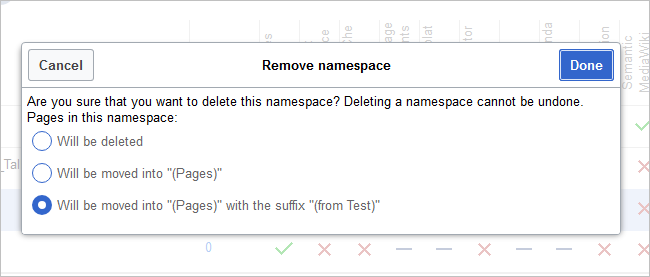
The button  can be used to delete a selected namespace. System namespaces and namespaces not created in the manager can not be deleted. You will be warned that you are about to delete the Namespace for good. If there are articles already in your namespace, you can choose what happens to them:
- they are deleted
- they are moved to the mainspace
- they are moved to the mainspace with a suffix "(from )"
Note: it is not possible to separately delete a discussion namespace, as this is associated with the corresponding custon namespace.
See also[edit | edit source]
Our reference page. Editing a namespace: A namespace can be edited by clicking on the "wrench" icon in the table row or above the table when a namespace is selected.
Names of talk namespaces or of system namespaces (File, MediaWiki) cannot be changed.
Deleting a namespace: Only custom (user created) namespaces can be deleted.
After clicking on the delete icon, a dialog with the delete options appears.
- Will be deleted: deletes the pages in this namespace together with the namespace
- Will be moved into "(Pages)": moves the pages of this namespace into the main namespace
- Will be moved into "(Pages)" with the suffix "(from [namespace name])": moves and appends the pages with "from [namespace]"
Talk namespaces are deleted with their corresponding namespace and cannot be deleted separately.