Difference between revisions of "Setup:Installation Guide/System Preparation/Linux/Apache and PHP"
← Setup:Installation Guide/System Preparation/Linux/Apache and PHP
| [quality revision] | [quality revision] |
(Tag: 2017 source edit) |
(Tag: 2017 source edit) |
|
|
The web server delivers your BlueSpice installation to the user's browser. Without a web server, BlueSpice cannot be used. The source code of BlueSpice is based on the scripting language "PHP". This must also be installed on your server in order to operate BlueSpice. The steps listed here are required. |
Introduction[edit | edit source]
Apache or Nginx are available as web servers under Linux. BlueSpice can theoretically also be operated with Nginx, but in this documentation only Apache is treated in detail. Of course, you can also install Nginx with the appropriate expertise and operate it according to the here documented Virtualhost configuration of Apache.
Installation[edit | edit source]
Install Apache and PHP using the Aptitude package manager with the following steps:
                apt update; \
apt install apache2 \
    libapache2-mod-php7.34 \
    php7.4 \
    php7.4-cli \
    php7.4-common \
    php7.4-curl \
    php7.4-gd \
    php7.4-intl \
    php7.4-json \
    php7.4-mbstring \
    php7.4-mysql \
    php7.4-opcache \
    php7.4-tidy \
    php7.4-xml \
    php7.4-zip; \
apt clean
Configuring PHP[edit | edit source]
After installation, configure PHP. Open php.ini with a text editor of your choice (nano, vi), which, in our Debian version, is located in the directory /etc/php/7.3/apache2.
Find the following settings and change the values accordingly. If a setting is commented out with a semicolon in front of it, please remove it.
date.timezone = Europe/Berlin
max_execution_time = 600
post_max_size = 128M
upload_max_filesize = 128M
Set the value for 'date.timezone' according to your own time zone.
Save and exit the php.ini again. File:Setup:apache vhost bluespice free.txt
Configuring Apache[edit | edit source]

|
In this documentation, we assume the recommended installation with ShortURL. In this case, the root directory of the web server is in /var/www/bluespice, but the actual source code of BlueSpice is in /var/www/bluespice/w. This configuration is designed accordingly. |
To configure a VirtualHost for BlueSpice, please proceed as follows:
-
Change to the directory
/etc/apache2/sites-available. -
In a text editor of your choice, open the file
bluespice.conf, which does not yet exist, and create it. Copy the entire contents of the following file into this new configuration file:- For BlueSpice free: apache_vhost_bluespice_free.txt
- For BlueSpice pro: apache_vhost_bluespice_pro.txt
- In rows 3 and 4, replace "SERVERNAME" and "SERVERALIAS" according to your server name and domain. If the server is explicitly operated with only one VirtualHost for BlueSpice, you can also completely remove these two lines.
- Save the file and close it.
Delete the VirtualHost created by default during the Apache installation with the command a2dissite 000-default. Then activate the just created VirtualHost with the command a2ensite bluespice.
Next, activate the Module Rewrite, which we configured in the bluespice.conf, by entering the following command: a2enmod rewrite
Next, create the directory /var/www/bluespice(mkdir/var/www/bluespice) and restart Apache with the command service apache2 restart.
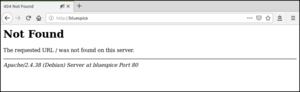
Next, call up the URL of your BlueSpice server. If configured correctly, Apache should respond to the request with the error message "Not found", which is completely correct at the time of installation.
Next step[edit | edit source]
If you have successfully completed all these steps, you can proceed to the next step " MariaDB".