| (23 intermediate revisions by 5 users not shown) |
| Line 1: |
Line 1: |
| − | {{DISPLAYTITLE:Installation Manual BlueSpice 3 With Installer}} | + | {{DISPLAYTITLE:Installing BlueSpice 3 with installer}} |
| | __TOC__ | | __TOC__ |
| | | | |
| − | ==Preface== | + | ==Introduction== |
| | With BlueSpice 3, we offer the installation as a complete package with MediaWiki and BlueSpice. | | With BlueSpice 3, we offer the installation as a complete package with MediaWiki and BlueSpice. |
| − | This installation manual give you step-by-step instructions to install BlueSpice. | + | This installation guide gives you step-by-step instructions to install BlueSpice. |
| | + | {{Box Note|boxtype=important|Note text=If you do a fresh install of BlueSpice 3.2 it might be necessary to run update.php afterwards if you get an error.}} |
| | + | {{Box Note|boxtype=note|Note text=This document only describes the steps for installing the web application itself. For the installation of extended functions such as [[Setup:Installation_Guide/Advanced/VisualEditor_Configuration|VisualEditor]] and [[Setup:Installation Guide/Advanced/ExtendedSearch Configuration|Extendedsearch]], please refer to the corresponding documentation. |
| | | | |
| − | ==Notes==
| |
| − | This document only describes the steps for installing the web application. For the installation of extended functions such as VisualEditor and ExtendedSearch, please refer to the corresponding documentation.
| |
| | | | |
| − | We will not go into details about your operating system installation here, but assume that you have already configured your system and stored the installation package in a Webroot of your choice, where you can access it via your browser. You can find more details in our detailed [[Setup:Installation Manual|installation manual]]. | + | We will not go into details about your operating system installation here, but assume that you have already [[Setup:Installation_Guide#Prerequesites|configured your system]] and stored the installation package in a web root of your choice, where you can access it via your browser. You can find more details in our detailed [[Setup:Installation Guide|installation guide]]. |
| | | | |
| − | Further help on the operating system setup can be found in our [[Setup:Installation Manual/Advanced|compendium]].
| |
| | | | |
| − | ==Installation step-by-step== | + | Further help on optimizing the operating system can be found in our [[Setup:Installation Guide/Advanced|compendium]].}} |
| | + | ==Step-by-step installation== |
| | | | |
| | {{Hint | | {{Hint |
| − | |text=If you also install the paid extension "BlueSpiceWikiFarm", make sure that the codesbase is not located directly in the DocumentRoot of your web server or VirtualHost - it must be located in the /w subfolder! | + | |text=If you also install the paid extension "BlueSpiceWikiFarm", make sure that the codebase is not located directly in the DocumentRoot of your web server or VirtualHost - it must be located in the /w subfolder! |
| | }} | | }} |
| | | | |
| − | First use call the URL in your browser at which the web application can be accessed. Then perform the following steps:
| |
| | {| class="wikitable" | | {| class="wikitable" |
| | |- | | |- |
| − | |[[File:bs3-install-01.png|300px|BlueSpice 3 Installation Step 1]] | + | |[[File:Setup:Screenshot 12.png|300x300px]] |
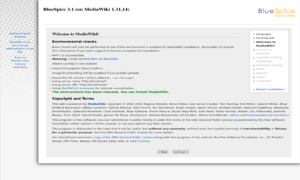
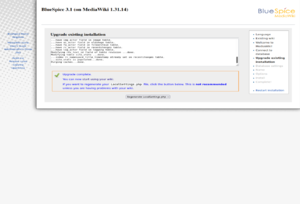
| − | ||If you don't meet all necessary requirements for PHP yet, you won't be able to view this setup page yet. Please make the necessary corrections to your PHP installation first.<br /><br />Otherwise you are now on the page shown in the screenshot. Click on "set up the wiki" to start the installation. | + | ||'''Step 1 - Start the installation setup''': First, open the URL of your web application in your browser. Then click on "set up the wiki" to start the installation. |
| | + | |
| | + | |
| | + | '''Note:''' If you don't meet all necessary requirements for PHP yet, you won't be able to view this setup page yet. Please make the necessary corrections to your PHP installation first.<br /><br />Otherwise, you are now on the page shown in the screenshot (click on the thumbnail to see the full screenshot). |
| | + | |
| | |- | | |- |
| − | |[[File:Setup:bs3-install-02.png|300px|BlueSpice 3 Installation Step 2]] | + | |[[File:Setup:Screenshot (213) 123.png|300x300px]] |
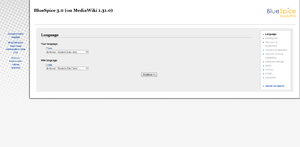
| − | ||You are now in the language selection. "Your language" defines the language you will be guided through the installer, "Wiki language" the later language of your wiki. | + | ||'''Step 2 - Select your language:''' You are now in the language selection. |
| | + | |
| | + | |
| | + | "Your language" defines the language that guides you through the installer, |
| | + | |
| | + | "Wiki language" the later language settings of your wiki. |
| | |- | | |- |
| − | |[[File:Setup:bs3-install-03.png|300px|BlueSpice 3 Installation Step 3]] | + | |[[File:Setup:Screenshot (215)3.png|300x300px]] |
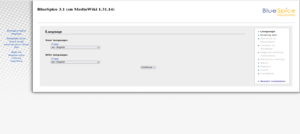
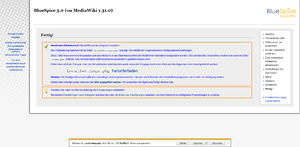
| − | ||The next step will take you to the MediaWiki installation check. Please read this check carefully, as possible hints may not block the installation, but may lead to restrictions of the wiki functionality in practice. Make desired corrections to your system and reload the page in your browser before proceeding with the setup. | + | ||'''Step 3 - MediaWiki Installation Check:''' This step takes you to the MediaWiki installation check. |
| | + | |
| | + | |
| | + | Please read this check carefully, as possible hints may not block the installation itself, but may lead to restrictions of the wiki functionality in practice. |
| | + | |
| | + | |
| | + | Make the necessary corrections to your system and reload the page in your browser before proceeding with the setup. |
| | |- | | |- |
| − | |[[File:bs3-install-04.png|300px|BlueSpice 3 Installation Step 4]] | + | |[[File:Setup:Screenshot (218).png|300x300px]] |
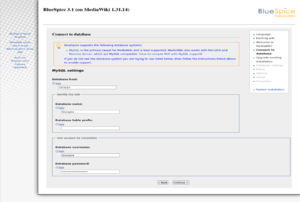
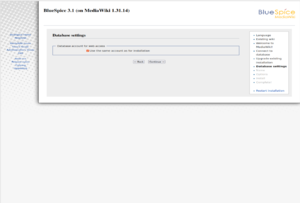
| − | ||The connection to the database is then configured. | + | ||'''Step 4 - Establish the database connection: '''In this step, you configure the database connection. |
| | + | |
| | + | |
| | + | Here you can either specify the root user of your MySQL server and in the following step have the installer create an additional user who only has access to the BlueSpice database. The database will also be created automatically if it does not yet exist. |
| | | | |
| − | Here you can either specify the root user of your MySQL server and in the following step have the installer create an additional user who only has access to the BlueSpice database. The database will also be created automatically if it does not yet exist. Alternatively, you can create a user and a database in advance and directly enter this information here. You can find information on the manual creation of users and databases in the [[mediawikiwiki:Manual:Installing_MediaWiki#MariaDB/MySQL|official Mediawiki documentation]].
| + | |
| | + | Or, alternatively, you can create a user and a database in advance and directly enter this information here. You can find information on the manual creation of users and databases in the [[mediawikiwiki:Manual:Installing_MediaWiki#MariaDB/MySQL|official Mediawiki documentation]]. |
| | |- | | |- |
| | |[[File:Setup:bs3-install-05.png|300px|BlueSpice 3 Installation Step 5]] | | |[[File:Setup:bs3-install-05.png|300px|BlueSpice 3 Installation Step 5]] |
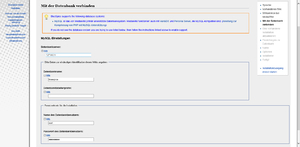
| − | ||Depending on the procedure you followed in the previous step, you can now define an exclusive user for your BlueSpice database. If you have already created the user explicitly for the database in advance, leave the check mark at "Use the same database account as during the installation process". | + | ||'''Step 5 - Create the BlueSpice database user: '''Depending on the procedure you followed in the previous step, you can now define an exclusive user for your BlueSpice database. |
| | + | |
| | + | |
| | + | If you have already created the user explicitly for the database in advance, leave the check mark at "Use the same database account as during the installation process". |
| | |- | | |- |
| | |[[File:Setup:bs3-install-06.png|300px|BlueSpice 3 Installation Step 6]] | | |[[File:Setup:bs3-install-06.png|300px|BlueSpice 3 Installation Step 6]] |
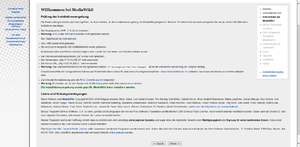
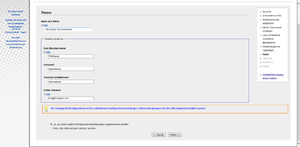
| − | ||Enter the name for your wiki. This name is displayed in the title bar of your browser and in various other places such as in notification mails. Pay attention to the correct spelling, because this name can only be changed afterwards with certain effort and certain risks. | + | ||'''Step 6 - Create your wiki name and administrator account: ''' Enter the name for your wiki. This name is displayed in the title bar of your browser and in various other places such as in notification mails. |
| | | | |
| − | You can also enter the username, password and e-mail address of the first administrative user to be created by the wiki during setup.
| + | |
| | + | Pay extra attention to the correct spelling, because this name can afterwards only be changed with a certain effort and certain risks. |
| | + | |
| | + | |
| | + | Next, enter the username, password and e-mail address of the first wiki administrator. The administrator account is then created by the wiki during setup. |
| | |- | | |- |
| − | |[[File:Setup:bs3-install-07.png|300px|BlueSpice 3 Installation Step 7]] | + | |[[File:Setup:Screenshot (223)e.png|300x300px]] |
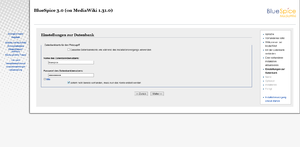
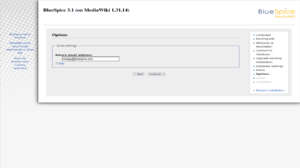
| − | ||In this step, you specify the e-mail address to be used as the sender address for notification e-mails. | + | ||'''Step 7 - Options:''' In this step, you specify the e-mail address for notification e-mails. |
| | |- | | |- |
| − | |[[File:Setup:bs3-install-08.png|300px|BlueSpice 3 Installation Step 8]] | + | |[[File:Setup:Screenshot (220)35.png|300x300px]] |
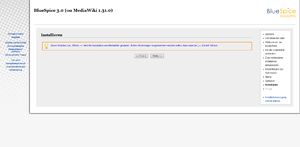
| − | ||You can skip this step directly with "Next". | + | ||'''Step 8 - Installation: ''' This step announces the installation of the wiki. If you don't need to make any changes to the previous steps, click "Next" to start the installation process. |
| | |- | | |- |
| − | |[[File:Setup:bs3-install-09.png|300px|BlueSpice 3 Installation Step 9]] | + | |[[File:Setup:Screenshot (219).png|300x300px]] |
| − | ||After the successful installation of BlueSpice you will receive this confirmation page, which you confirm with "Next". | + | ||'''Step 9 - Installation status: '''After the successful installation of BlueSpice, you see a confirmation page that you confirm with "Next". |
| | |- | | |- |
| − | |[[File:Setup:bs3-install-10.png|300px|BlueSpice 3 Installation Step 10]] | + | |[[File:Setup:Screenshot (224).png|300x300px]] |
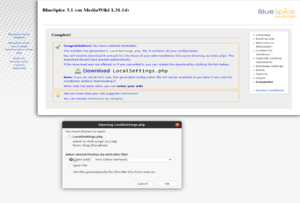
| − | ||In the last step of the installation you will be asked to download the configuration file "LocalSettings.php" of your installation. Download it and place it in the root directory of your BlueSpice codebase. | + | ||'''Step 10 - Download LocalSettings.php:''' In the last step of the installation, you will be asked to download the configuration file "LocalSettings.php" of your installation. Download it and place it in the root directory of your BlueSpice codebase. |
| | |- | | |- |
| − | |[[File:Setup:bs3-install-11.png|300px|BlueSpice 3 Installation Step 11]] | + | | |
| − | ||If you now access the BlueSpice URL you have chose, you will receive the completed installation and can now start using BlueSpice directly. | + | |'''Step 11 - Rename the template folders:''' Open the folder <code>..\extensions\BluesSpiceFoundation</code> and rename the subfolder <code>config.template</code> to <code>config</code> and create the new folder <code>data</code>. These folders should have read and write access, see [[Setup:Installation Guide/Security Settings/File System Permissions|File System Permissions]]. |
| | + | Run the script <code>..\maintenance\update.php</code> from the console. |
| | + | |
| | + | If you receive the error message "Fatal exception of type MWException", open the terminal and run the command "sudo nautilus". After that, give the folder /var where bluespice was installed all rights. |
| | + | |- |
| | + | |[[File:Setup:bs3-install-11.png|300px|BlueSpice 3 Installation Step 12]] |
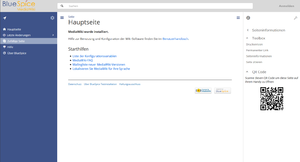
| | + | ||'''Step 12 - Load the BlueSpice welcome page: '''If you now access the URL you specified for BlueSpice, you now see the BlueSpice welcome page. You can start using BlueSpice immediately. |
| | |} | | |} |
| | | | |
| | + | == BlueSpice WikiFarm == |
| | + | If you are installing BlueSpice WikiFarm follow these [[:en:Setup:Installation_Guide/Installation_BlueSpice_WikiFarm|instructions]] |
| | + | |
| | + | Now open a command line and change to the folder <code><installpath-bluespice></code>. Run the following command: |
| | + | |
| | + | *php maintenance/update.php ''(Linux)'' |
| | + | *php maintenance\update.php ''(Windows)'' |
| | + | {{Box Note|boxtype=note|Note text=If the page is not loading, give the group "users" change-permissions for the folder C:\Windows\Temp.}}{{Box Note|boxtype=important|Note text=As next step, you can configure [[Setup:Installation Guide/Advanced/VisualEditor Configuration|VisualEditor]] and [[Setup:Installation Guide/Advanced/ExtendedSearch Configuration|Extendedsearch]].}} |
| | [[en:{{FULLPAGENAME}}]] | | [[en:{{FULLPAGENAME}}]] |
| − | [[de:Setup:Installationsanleitung/Installation_mit_Installer]] | + | [[de:Setup:Installationsanleitung/Installation von BlueSpice]] |