Difference between revisions of "Setup:Installation Guide/Upgrade"
| [quality revision] | [quality revision] |
(Tag: Visual edit) |
Contents
This document describes the update upgrade of BlueSpice from version 2.23.x-2.27.x to the current version 2.27.2. BlueSpice 3.
Infos for patch updates and for switching from Bluespice free to pro are documented separately.
Contents
Notes[edit | edit source]
- Please, read this manual completely and follow work through the single installation steps in the given orderone after another.
- For editing the configuration files in with a text editor, it is necessary to save the files must be saved in UTF-8 code coding without BOM (Byte Order Mark).
-
The placeholder
<installpath-bluespice>is representative stands for the path to your BlueSpice installationBlueSpice installation, e.g .C:\inetpub\wwwroot\bluespice(Windows ) oder regarding the documentation "Folder structure under Windows") or/var/www/bluespice(Linux). -
The placeholder
<bluespice-url>is representative for the URL of your BlueSpice installationplaceholder<tomcat-webappsstands for the path to the webapps directory of your Tomcat server, e.g . http://localhost/bluespice.
-
C:\Program Files\Apache Software Foundation\Tomcat 8.5\webapps(Windows) or/var/lib/tomcat8/webapps(Linux).
Approach[edit | edit source]
For the update of BlueSpice to the BlueSpice version 2.27.2, an already installed and fully configured MediaWiki 1.27.x is required. This must be accessable at <bluespice-url> in your browser. If your current BlueSpice installation does not use MediaWiki 1.27.x, visit the Update Manual for MediaWiki 1.23.x to 1.27.x for more information.
Backup[edit | edit source]
It is absolutely necessary to create a backup copy of your current installation before updating the wiki.
Backup Database[edit | edit source]
To back up your database, use the on-board "mysqldump" program from MySQL / MariaDB: To do this, please open a console, change the directory <installpath-bluespice> and save the database using the following command:
mysqldump -u <username> -p --lock-tables <database> > database.sql
For <username> please use your administrative database user (usually "root"). For <database> use the database name of your MediaWiki/BlueSpice installation.

Backup File System[edit | edit source]
Save the complete directory <installpath-bluespice>, which now contains the database image, to a different location on your server.
For security reasons, immediately delete the file <installpath-bluespice>/database.sql.
Download BlueSpice[edit | edit source]
Download the current version of BlueSpice from Sourceforge.The package corresponding to this manual bears the name BlueSpice-free-2.27.2.zip.
Unzip and Copy BlueSpice[edit | edit source]
Unzip the downloaded BlueSpice archive. Please make sure that all relevant content is placed in one subfolder (e.g. bluespice-free). This subfolder contains the following directories and files:
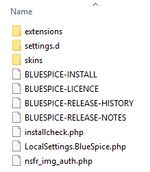
- extensions
- settings.d
- skins
- BLUESPICE-INSTALL
- BLUESPICE-LICENSE
- BLUESPICE-RELEASE-HISTORY
- BLUESPICE-RELEASE-NOTES
- installcheck.php
- LocalSettings.BlueSpice.php
- nsfr_img_auth.php (BlueSpice pro only)
Copy the unzipped subfolders into the <installpath-bluespice> and overwrite the exsting files.
Delete the directory <installpath-bluespice>/extensions/BlueSpiceDistribution as long as it is still available from an old BlueSpice installationMake sure that your BlueSpice 2 version is up to date.
It is recommended to first create a complete new installation of BlueSpice 3 in parallel with BlueSpice 2 and then transfer the data to the new system.
|
|
First of all, make a complete backup of your installation. |
First of all, rename your current installation directory. For example, from /var/www/bluespice to /var/www/bluespice227.
Then, copy the new program files to the original installation location. Now you should have two directories, for example /var/www/bluespice227 with the program files of BlueSpice 2.27 and /var/www/bluespice with the program files of BlueSpice 3.
Next, uploaded files and configuration files managed by BlueSpice must be transferred to the new installation. Just move the directories images/ and extensions/BlueSpiceFoundation/config from the old installation location to the new one.
Next, the main configuration file must be transferred and adapted. Copy the LocalSettings.php file from the old installation location to the new one.
Setup LocalSettings.php[edit | edit source]
Open the file <installpath-bluespice>/LocalSettings.php. Look for the following lines:
# End of automatically generated settings.
# Add more configuration options below.
Delete all following lines. If you have made additional configurations - apart from steps outlined in the old installation manual - under below these lines, please make sure to keep these additional configurations in each case.
Insert the following lines instead line at the end of LocalSettings.php:
require_once "$IP/LocalSettings.BlueSpice.php";
Close and save the file.
|
|
Starting with BlueSpice 2.27.1, all default settings as well as the individual modules of BlueSpice are stored. Thus BlueSpice is only integrated with this one line in MediaWiki. For technical information, visit the documentation for advanced users. |
Optional: Setup BlueSpiceExtensionsUpgrading BlueSpice[edit | edit source]
If you have already created the file <installpath-bluespice>/extensions/BlueSpiceExtensions/BlueSpiceExtensions.local.php in your current BlueSpice version, please switch to the directory <installpath-bluespice>/extensions/BlueSpiceExtensions and rename this mentioned file into BlueSpiceExtensions.bak.php.
In the next step, copy the file BlueSpiceExtensions.default.php to BlueSpiceExtensions.local.php
Please compare the files BlueSpiceExtensions.local.php and BlueSpiceExtensions.bak.php and make any uncomments/comments to the individual extensions made by you in the past. This is especially applicable to Extended Search and PDF Export.
|
|
Under Windows, make sure that the environment variables are set correctly to access the php command. |
|
|
Under Linux, please note that you have to adjust the file system permissions after running the update.php. |

Open your command line or terminal an change to the directory <installpath-bluespice>. run Run the following command there:
                php maintenance/update.php (Linux)
php maintenance\update.php (Windows))
When the script is finished with the "Done" message, proceed to the next step.
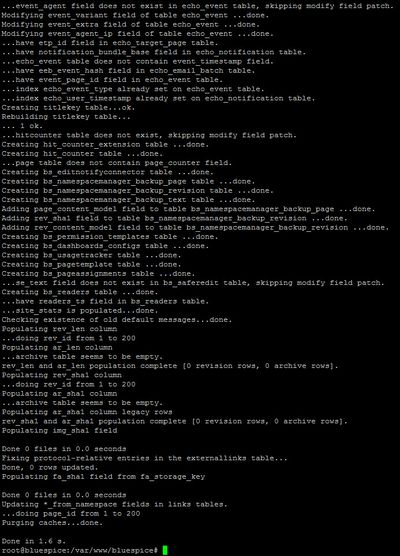
If the script should stop running, restart it.
Installation of the webservice to use the LatexRenderer (BlueSpice pro only)[edit | edit source]
Starting with BlueSpice 2.27.2 the extension "BlueSpiceLatexRenderer" replaces the extension "Math".
Please note: LatexRenderer is a part of BlueSpice pro edition only!
Please note that you have to install the webservice to use this extension.
When updating please also delete the folder <installpath-bluespice>/extensions/Math.
The usage of the tag 
Check Checking the installation[edit | edit source]
Open <bluespice-url> in your browser. Your BlueSpice upgrade should now be successfully updated to version 2.27.2 and a login completed. Logging in with your access data should be possible.