Difference between revisions of "Setup:Installation Guide/Advanced/VisualEditor Configuration"
← Setup:Installation Guide/Advanced/VisualEditor Configuration
| [quality revision] | [quality revision] |
m (Mlink-rodrigue moved page Setup/Installation Guide/Advanced/Visual Editor Configuration to Setup/Installation Guide/Advanced/VisualEditor Configuration without leaving a redirect) |
m (Mlink-rodrigue moved page Setup/Installation Guide/Advanced/VisualEditor Configuration to Setup:Installation Guide/Advanced/VisualEditor Configuration without leaving a redirect: wrong path) |
Before you can use VisualEditor in BlueSpice, you have to activate it in your installation:
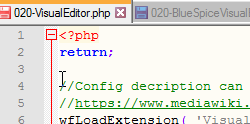
In the BlueSpice installation directory, locate the following files inside the folder „var\www\settings.d“:
020-VisualEditor.php:
020-BlueSpiceVisualEditorConnector.php:
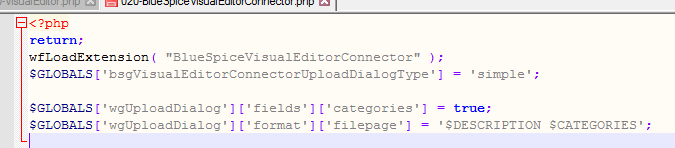
- Remove the line containing the „return;“ command in both files and save them.
- Restart your web server (recommended).
Checking the Configuration manager[edit | edit source]
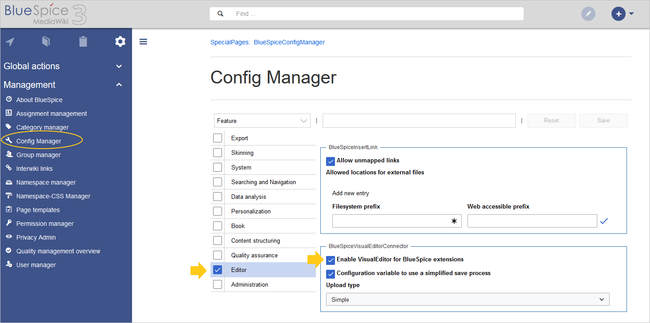
In case the VisualEditor is still not appearing, check if VisualEditor is shown as activated in the configuration manager of your wiki:
- Go to Global actions > Config manager
-
Make sure the checkbox "Enable VisualEditor for BlueSpice extensions" is activated:
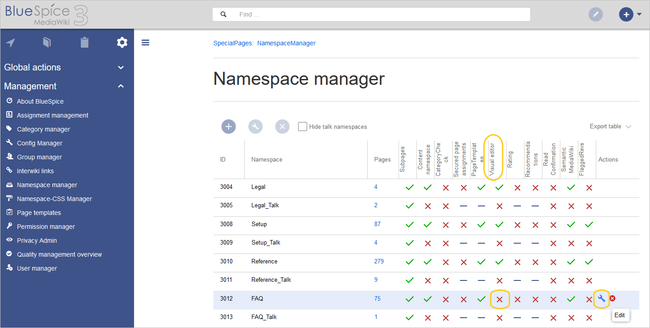
By default, VisualEditor is only activated in the main (Pages) and the User namespaces.
Activating VisualEditor for a namespace[edit | edit source]
- Go to Global actions > Namespace manager In the column "VisualEditor", you can see which namespaces have VisualEditor activated. They have a green check mark.
-
Click the wrench icon in the "Actions" column. The wrench appears, when you hover over the row of the namespace:
-
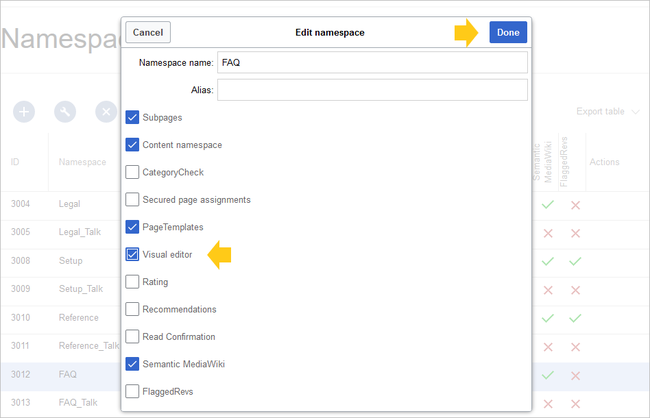
Activate the checkbox for VisualEditor in the dialog window and click "Done":
- Refresh the Namespace manager page (F5) to confirm the change.
VisualEditor should now be working correctly in all namespaces that actively use it.