Difference between revisions of "Setup:Installation Guide/With Installer"
| [quality revision] | [unchecked revision] |
(Tag: Visual edit) |
Contents
- 1 Tip for this Document
- 2 Requirements
- 3 Download BlueSpice
- 4 Unzip and Copy BlueSpice
- 5 Renaming of Relevant Folders
- 6 Adjusting File System Permissions
- 7 Starting the installation
- 8 Language selection
- 9 Checking the Installation Environment
- 10 Database Settings
- 11 Wiki Settings
- 12 Extended Settings
- 13 Deposit LocalSettings.php
- 14 Checking the Installation Requirements
- 15 Check Installation
- 16 Further configuration

Please note that this installation guide does only work with the edition BlueSpice free! With BlueSpice 3, we offer the installation as a complete package with MediaWiki and BlueSpice.
These installation manual give you step-by-step instructions to install BlueSpice.
Tip for this Document[edit | edit source]
<installpath-bluespice> stands for the path to your BlueSpice installation, e.g C:\inetpub\wwwroot\bluespice (Windows) or /var/www/bluespice (Linux).
<bluespice-url> stands for the URL to your future BlueSpice installation, e.g. http://localhost/bluespice.
This document only describes the steps for installing the web application. For the installation of extended functions such as VisualEditor and ExtendedSearch, please refer to the corresponding documentation.
We will not go into details about your operating system installation here, but assume that you have already configured your system and stored the installation package in a Webroot of your choice, where you can access it via your browser.
Further help on the operating system setup can be found in our compendium.
Requirements[edit | edit source]
Web server[edit | edit source]
The system must already be running a Web server (IIS / Apache) that is configured to access <bluespice-url>.
PHP[edit | edit source]
PHP must be embedded in the web server. Ensure that the following modules are enabled:
- php-curl
- php-gd
- php-tidy
MariaDB/MySQL[edit | edit source]
A database server (MariaDB oder MySQL) must be set up and available. You need administrative access (root).
Download BlueSpice[edit | edit source]
Download the current version of BlueSpice directly at Sourceforge. The package is named BlueSpice-free-2.27.3.zip.
Unzip and Copy BlueSpice[edit | edit source]
Unzip the downloaded archive with BlueSpice. Note that the relevant content is located in the subfolder "bluespice-free-installer". Move the complete content to <installpath-bluespice> and integrate it into existing folders.
Renaming of Relevant Folders[edit | edit source]
Rename the following folders in <installpath-bluespice> as follows:
-
extensions/BlueSpiceFoundation/data.template
--> extensions/BlueSpiceFoundation/data -
extensions/BlueSpiceFoundation/config.template
--> extensions/BlueSpiceFoundation/config
Adjusting File System Permissions[edit | edit source]
Make sure that the following folders in <installpath-bluespice> are accessible and writable by the webserver:
- cache
- images
- extensions/BlueSpiceFoundation/data
- extensions/BlueSpiceFoundation/config
Detailed information about the file system permissions can also be found in our installation manual at the security settings.
Starting the installation[edit | edit source]
Open <bluespice-url> in your browser. You should get the start page for installation:
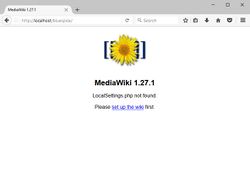
Continue by clicking "set up the wiki".
Language selection[edit | edit source]
You will be asked for the language during the installation process and the system language of your installation
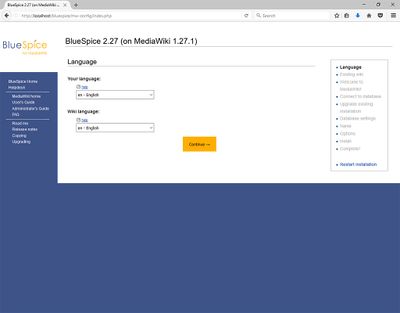
Select the required language and click "Next".
Checking the Installation Environment[edit | edit source]
The following page should allow you to skip with "Next" in most cases. If errors (red font) are displayed, there is a need for action at your server environment. Please do the necessary corrections.
Database Settings[edit | edit source]
On the following page, you will be prompted to enter your database settings.
- If the database server is on the same PC as the MediaWiki installation, please do not use "localhost" but "127.0.0.1".
- The database itself is created in the further process if it does not already exist. You do not have to create the database in advance.
- The database table prefix does not have to be specified. This only makes sense if you need the database for other database tables than for your MediaWiki installation.
-
Please enter the user name and password of the administrative database user (usually root).
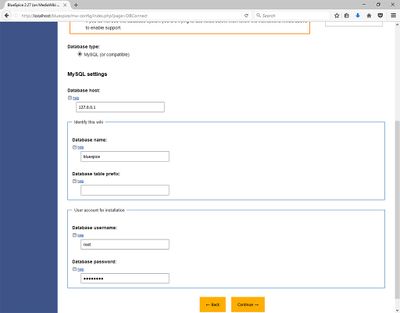
Click "Next".
On the second page about the database it is recommended to create your own database user for your installation. Deactivate the checkbox "Use the same database account as during the installation process" and enter a username and password of your choice. Activate the checkbox "If not already existing, you have to create the account now".
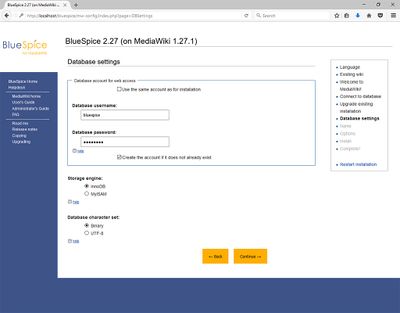
Then click "Next".
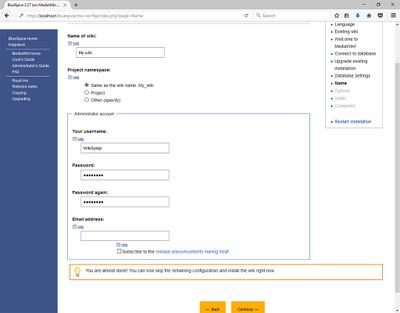
Wiki Settings[edit | edit source]
Now enter a name of your choice for your wiki. You can also define an administrative user and his password here. You can change the email address of this user at any time in the user settings. Leave all the other settings as they are and click "Next".
Extended Settings[edit | edit source]
The settings on the now displayed page should be set as shown in the following screenshot. Please adjust the email address according to your needs, the paths in the section "Uploading Images and Files" are automatically filled and should be left as they are.
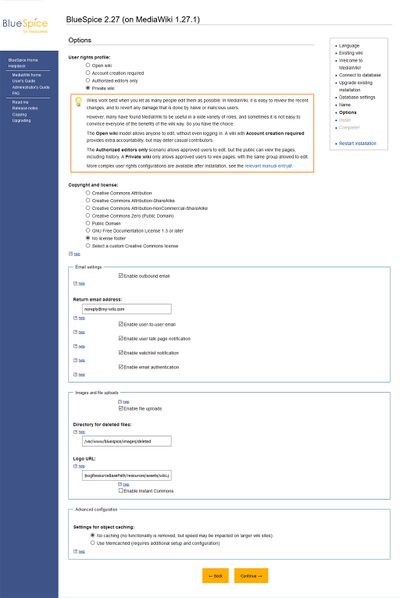
Then click on "Next". Also confirm the following pages with "Next".
All necessary settings are made now. Please confirm with "Next" again.
Deposit LocalSettings.php[edit | edit source]
Finally, the "LocalSettings.php" will be provided for downloading it. Please do this and move the file to <installpath-bluespice>.
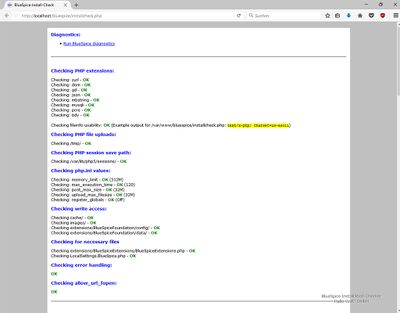
Checking the Installation Requirements[edit | edit source]
Call up the file installcheck.php at <bluespice-url> in your browser (example: http://localhost/installcheck.php). Correct all red (error) and ideally yellow (warning) declared messages (mostly in the php.ini) like specified. Please note, that changes in the php.ini may require a restart of the webserver. Do not continue until you have been able to remove at least all errors (red).
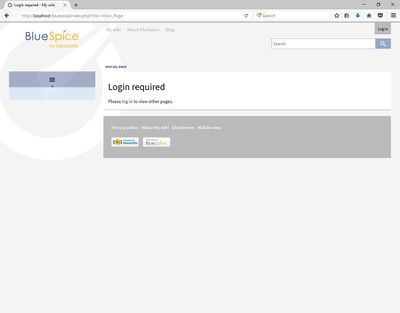
Check Installation[edit | edit source]
Call <bluespice-url> in your browser. BlueSpice should now be successfully installed and a login with your access data should be possible.
Further configuration[edit | edit source]
Your BlueSpice installation is now ready to use. You can also do some further configuraiton:
- Setup of the extended search search
- Setup of the PDF export
Also, some security settings are recommended.