Difference between revisions of "Setup:Installation Manual/Services and system configuration/Memcached"
← Setup:Installation Manual/Services and system configuration/Memcached
| [quality revision] | [quality revision] |
m (Sguertler moved page Setup:Installation Manual/System Configuration/Memcached to Setup:Installation Manual/Services and system configuration/Memcached) |
Contents
This document describes how to set up the memcached server, with which you can achieve some speed optimization. For the configuration of BlueSpice, also read the paragraph "Activate Memcached" in the "Caching" article.
Tips for this Document[edit | edit source]
- Please, read this manual completely and work through the single installation steps one after another.
- For editing the configuration files with a text editor, the files must be saved in UTF-8 coding without BOM (Byte Order Mark).
Linux[edit | edit source]
Installation[edit | edit source]
Install the memcached server in the package manager of your distribution.
Configuration[edit | edit source]
Open the file that contains the memcached configuration (for example, /etc/memcached.con under Debian / Ubuntu).Locate the -m argument and increase the amount of memory available depending on the capabilities of your server:
-m 1024
Save and close the file, and restart memcached.
Check the Server[edit | edit source]
Verify that the memcached server is running:
netstat -tulpn | grep 11211
If you receive an output that is similar to this, memcached has started successfully:
 root@bluespice:/var/www/bluespice# netstat -tulpn | grep 11211
 tcp   0 0 127.0.0.1:11211   0.0.0.0:*     LISTEN      15163/memcached
 udp   0 0 127.0.0.1:11211   0.0.0.0:*                 15163/memcached
 root@bluespice:/var/www/bluespice#
Windows[edit | edit source]
The use of Nick Pirocanac's MemCacheD Manager is highly recommended. This makes the configuration very simple.
Requirements[edit | edit source]
An installed .NET Framework version 3.5 is required for the MemCacheD Manager.
Download[edit | edit source]
Download the MemCacheD Manager from software.informer.com.
Installation[edit | edit source]
During the installation you have hardly any setting possibilities, so you can "click" throuch the installation process without any changes.
Starting the MemCacheD Manager[edit | edit source]
Always start the MemCacheD Manager from the start menu as administrator (right click -> Run as administrator)!
Configuration[edit | edit source]
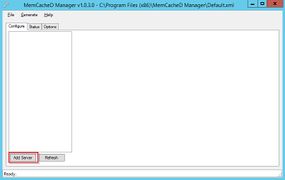
- In MemCacheD Manager, click "Add Server"
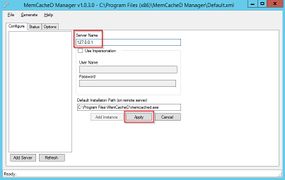
- Enter the local IP "127.0.0.1" under "Server Name" and click on "Apply"
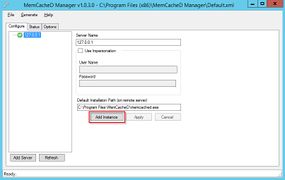
- Click "Add Instance"
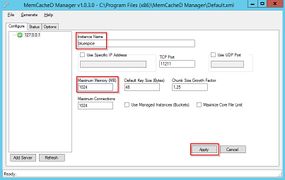
- Enter any desired name under "Instance Name"
- Under Maximum Memory, increase the available memory depending on the capabilities of your server
- Click "Apply"
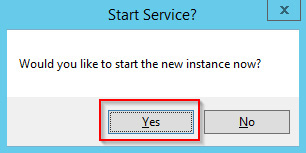
-
Start the new created instance by clicking on "Yes"
The Memcached Server is now installed and configured.