Page is a draft due to changes in included resources
You are viewing an old version of this page. Return to the latest version.
FlexiSkin
-
- Last edited 5 years ago by MLR
-
-
- This page is a draft but has an approved version
< Manual:Extension
Revision as of 10:05, 10 November 2020 by Mlink-rodrigue (talk | contribs)
FlexiSkin allows you to customize the skin of your wiki. You can change the design of your wiki via a Special page and with a preview function. Easily insert your own logo and favicon and define the colors and font settings you want to achieve a custom look.
Important! FlexiSkin is only available in BlueSpice pro Cloud.
Where to find FlexiSkin?
The FlexiSkin settings can be adjusted on the page Special:FlexiSkin (- watch the spelling as the wiki is case-sensitive).
Logo and Favicon
Logo
The fastest way to customize your wiki is to simply upload your own logo. The wiki will automatically fit the image into the top bar.
Note: The maximum dimensions for the logo are 300 x 64 pixels. If you upload a larger image, it will be cut off.
To upload your logo:
- Click Select a file to choose a file from your file explorer or drag the file into the dotted area of the Logo upload area.
- Click Preview to see the positioning of your logo.
- Check the logo preview in your wiki.
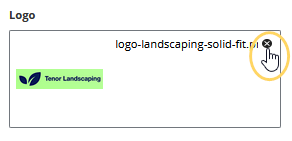
- To upload a different logo, click the x-icon in the logo upload area and repeat the previous steps.
- Save and activate the logo or continue with theming your wiki.
Tips for working with the logo
- Alignment: The logo is placed at the left side of the top bar without any padding or margin applied. The easiest way to make your logo fit: Put it on a 300 x 64 pixel canvas in an image editor and position the actual logo with the desired padding within that area. Then upload your logo.


