You are viewing an old version of this page. Return to the latest version.
Version of 08:22, 25 October 2019 by MLR
No categories assigned
VisualEditor Configuration
-
- Last edited 6 years ago by MLR
-
< Setup:Installation Guide | Advanced
Revision as of 08:22, 25 October 2019 by Mlink-rodrigue (talk | contribs) (Created page with "Before you can use VisualEditor in BlueSpice, you have to activate it in your installation: In the BlueSpice installation directory, locate the following files inside the fol...")
Before you can use VisualEditor in BlueSpice, you have to activate it in your installation:
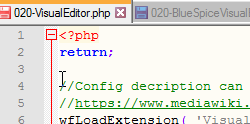
In the BlueSpice installation directory, locate the following files inside the folder „var\www\settings.d“:
020-VisualEditor.php:
020-BlueSpiceVisualEditorConnector.php:
- Remove the line containing the „return;“ command in both files and save them.
- Restart your web server (recommended).
Checking the Configuration manager
In case the VisualEditor is still not appearing, check if VisualEditor is shown as activated in the configuration manager of your wiki:
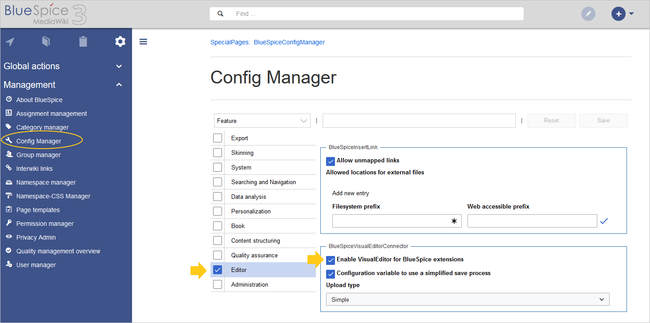
- Go to Global actions > Config manager
- Make sure the checkbox "Enable VisualEditor for BlueSpice extensions" is activated:

By default, VisualEditor is only activated in the main (Pages) and the User namespaces.
Activating VisualEditor for a namespace
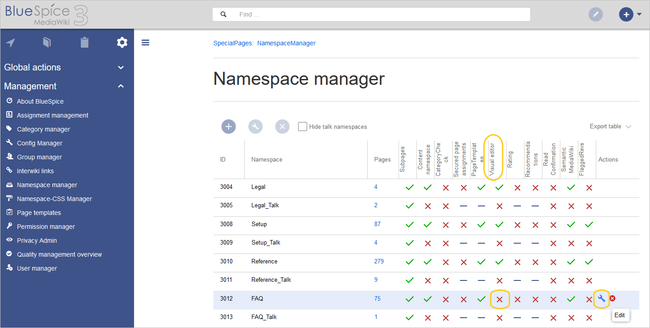
- Go to Global actions > Namespace manager In the column "VisualEditor", you can see which namespaces have VisualEditor activated. They have a green check mark.
- Click the wrench icon in the "Actions" column. The wrench appears, when you hover over the row of the namespace:

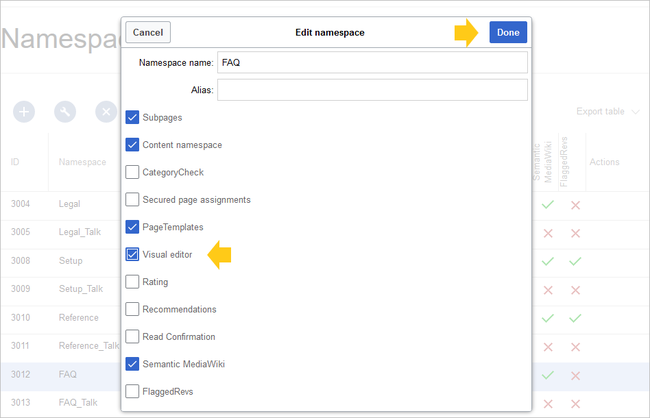
- Activate the checkbox for VisualEditor in the dialog window and click "Done":

- Refresh the Namespace manager page (F5) to confirm the change.
VisualEditor should now be working correctly in all namespaces that actively use it.

