FlexiSkin
-
- Last edited 3 years ago by MLR
-
-
- This page is a draft but has an approved version
Contents
FlexiSkin allows you to customize the look and feel of your wiki. You can change the design of your wiki via a Special page and with a preview function. Easily insert your own logo and favicon and define the colors and font settings you want to achieve a custom look.
Important! FlexiSkin is only available in BlueSpice pro Cloud.
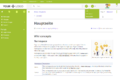
Where to find FlexiSkin?
The FlexiSkin settings can be adjusted on the page Special:FlexiSkin (- watch the spelling as the wiki is case-sensitive).
Logo and Favicon
Logo
The fastest way to customize your wiki is to simply upload your own logo.
Note: The maximum dimensions for the logo are 300 x 64 pixels. If you upload a larger image, it will be cut off.
To upload your logo:
- Click Select a file to choose a file from your file explorer or drag the file into the dotted area of the Logo upload area.
- Click Preview to see the positioning of your logo.
- Check the logo preview in your wiki.
- To upload a different logo, click the x-icon in the logo upload area and repeat the previous steps.
- Save and activate the logo or continue with theming your wiki.
- Click OK to acknowledge that the changes are applied immediately and affect all wiki users.


Tips for working with the logo
- Alignment: The logo is placed at the left side of the top bar without any padding or margin applied. The easiest way to make your logo fit: Put it on a 300 x 64 pixel canvas in an image editor and position the actual logo with the desired padding within that area. Then upload your logo.
- Adjusting placement and size: If you have a standard logo that you don't want to reposition on a canvas before uploading, simply upload your logo and add the following to the Free CSS area in FlexiSkin and save the page.
Note: You will first have to save the page to view the logo changes made in Free Css. The preview does not reflect these changes.
@media (min-width: 1001px) {
header nav.navbar {
    padding-left:0; /*add a padding to the left of your logo, e.g. change from 0 10px*/
 }
.bs-logo {
        width:300px; /*sets available logospace to the entire width of the main navigation*/
 }
.bs-logo a {
    background-size: auto 100%; /* width is set to automatically resize based on height. Set height to up to 90% */
 }
}
You can adjust the background size and left-padding as needed.
Favicon
You can also upload your own favicon. The favicon is the image that is shown in the browser tabs. Follow the steps for uploading a logo, just use the favicon upload area instead.
-
- After saving the page, you will see your custom image in the browser tabs of your wiki pages.


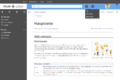
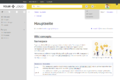
Theming
Color presets
The fastest way to customize your wiki colors is to pick a color preset from the available themes. You can fine-tune each theme as needed if one or another color requires tweaking.
The available standard themes are shown here.
bluespice
turquoise
orange
crimson
lime
turquoise dark
sunflower dark


Custom color scheme
Starting with a custom color scheme, you can further adjust individual skin colors to match your own color scheme.
To get started, click on the edit icon next to a color scheme. In my example, I want to have text and a neutral background in my navigation, so I pick "sunflower dark" and then edit it. But first, let's look at the color assignments.

| Background color | Foreground color
(=Text color) |
User interface elements |
|---|---|---|
| Color 1 | Color 1 | left navigation, edit and create buttons with drop down menus, user profile menu |
| Color 2 | Color 2 | page tools / quality management tools |
| Color 3 | Color 3 | top bar (since there is no text in the top bar, the foreground color only sets the color of the toggle icons) |
| Color 4 | Color 4 | custom menuwith drop down menus |
| Body background | - | background of page content - the associated text colors in the content area are set in the Content settings of FlexiSkin |

- As an example, we make some color changes.
- This results in the following color scheme:


Content
Free CSS