Set up groups and namespaces
-
- Last edited 7 years ago by Florian Bäckmann
-
-
- No status information
This howto explains how to set up namespaces and related groups, permissions and permission assignments to users in just a few steps.
Contents
Use-Case
We need namespaces and groups, if for example:
- in addition to a public space for general information, a room for internal information should also be set up, or
- if you have a special type of article (such as articles in a manual) that should be read by all registered users, but not edited by anyone, or
- if all changes to a particular group of articles are to be made in a draft version until they can be shared by an editor.
Affected Areas
To configure the wiki appropriately, the following tools are required:
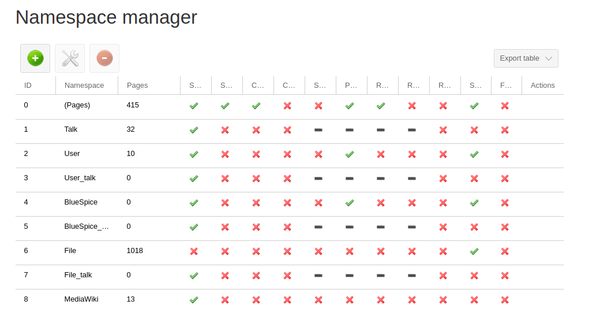
- Namespace Manager: Here, the namespace is first set up, in which the articles to be protected should be located (for example, "manual")
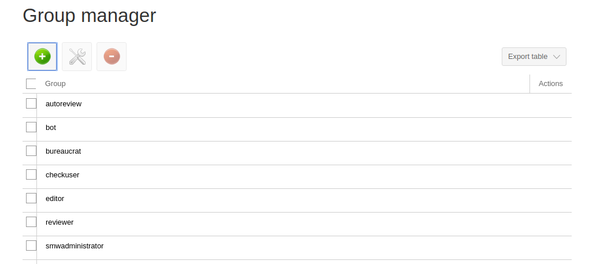
- Group Manager: Here the required groups are defined (for example manual editor)
- Permission Manager: These groups need rights that are assigned here
- User Manager: When everything is ready, you can assign the user the appropriate group rights here.
Steps
Set up namespaces
First, the namespace in the namespace management is set up in the Administration area (this requires administration rights).
Use the green plus symbol to add a new namespace..
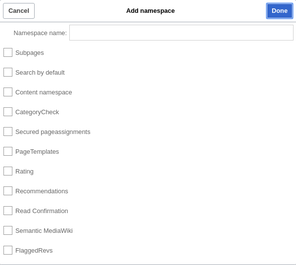
The dialog "Add namespace" opens, where the name of the namespace is entered and, if necessary, further namespace options are selected.
More information about the Namespace Manager can be found in the corresponding page about the Namespace Manager in the manual.
Set up groups
Next, the required groups are set up. Here too you will find the necessary administration page in the admin area of your wiki. For a new group, first click on the green plus symbol to open the "New group" dialog.
Then you just need to enter the desired group name.
More information about Group Manager can be found in the corresponding page about the Group Manager in the manual.
Permission assignment
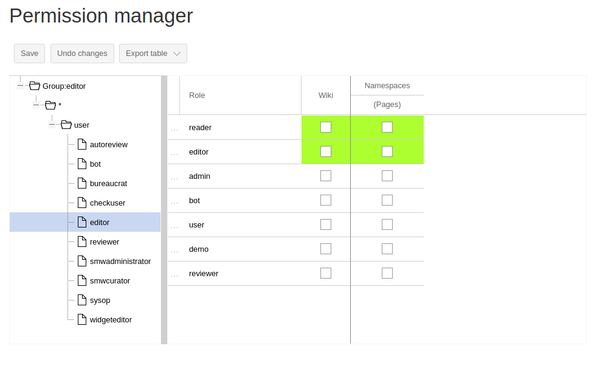
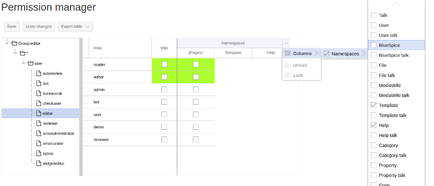
Now comes the permission assignment in the Permission Manager. The Permission Manager is basically divided into three areas:
- A section for the groups on the far left (which can be opened or closed by a click on the arrow symbol)
- A division in which the permission are listed and selected (the permissions are again divided into "Namespace specific permissions" and "Namespace independent permissions")
- A division in which namespaces and related permissions are selected. Here you can select a permission for a group either for the entire wiki or for a namespace.
If you would like to add exclusive permissions to a group on a namespace, you first select the desired group in the division for groups by clicking on them.
By clicking on the arrow symbol next to the heading for namespaces, a menu can be opened in which the needed namespaces can be selected by selecting a checkbox.
Then you select the permissions that the currently selected group should receive exclusively via the checkboxes in the respective column of the namespace (Y-axis) for the respective desired permission (X-axis).
More information about Permission Manager can be found in the corresponding page about Permission Manager in the manual.
Assign user to groups
Finally, the users will be assigned to the groups. This can be realized either for existing users oder users to be created. For this, the User Manager is needed.
Existing user
To add an existing user to a group, click on the ![]() -Icon for the group-selection in the row of the desired user account.
-Icon for the group-selection in the row of the desired user account.
This will open the "Groups" dialog and a drop-down menu will list the groups in the system. A group can be selected by clicking on it.
This process can be done several times to add more than one group. Then the group selection can be saved with a click on the OK-button.
User to be created
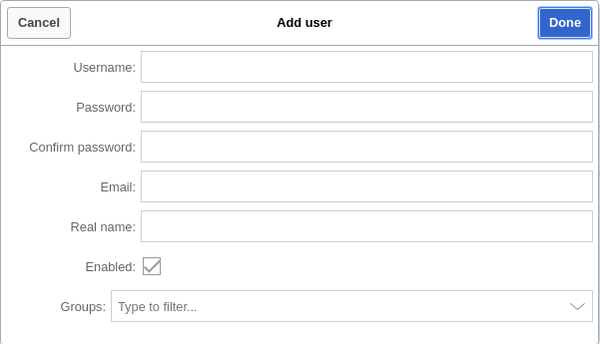
If a user should be assigned to a group as soon as they are created, a click on the green plus symbol in the user administration is first required, which opens the "Add user" dialog.
In this dialog, you can assign the groups associated with the user in addition to the various user data at the bottom of the "Groups" drop-down menu.
The drop-down menu has the same structure as the previous one for existing users: all groups in the system are listed, by clicking a group it will get selected, this process can be repeated several times if the user is to be assigned to several groups and finally the user and the group-assignments will be saved by clicking on the OK-Button.
More information on User Manager can be found in the corresponding page on the User Manager in the manual.
