Apache Tomcat
-
- Last edited 6 years ago by MLR
-
-
- This page is a draft but has an approved version
Contents
| Apache Tomcat is required for the PDF export, VisualDiff (BlueSpice pro only) and the LaTeX renderer (BlueSpice pro only). The following steps are optional and only required if you want to use one or more of these services in your BlueSpice installation. |
| Operation of Apache Tomcat requires OpenJDK. If you have not installed it, follow the link above. |
Download
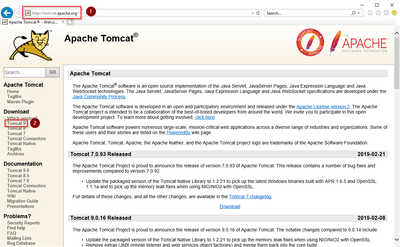
Open the official download page (1) in your browser and go to the version 9 (2) download page.
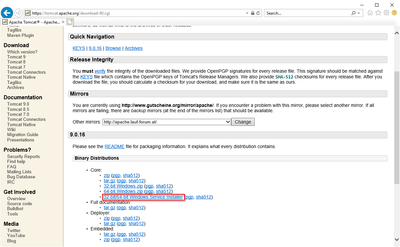
Download the "32-bit/64-bit Windows Service Installer"
| Please note that the download on your Windows server with Internet Explorer only works if you have configured the Internet Explorer Advanced Security Settings in the Server Manager. Please refer to the technical documentation from Microsoft. |
| This guide uses version 9.0.16 of Apache Tomcat and is just an example of the latest version that you can download at the time of installation. |
Installing Apache Tomcat
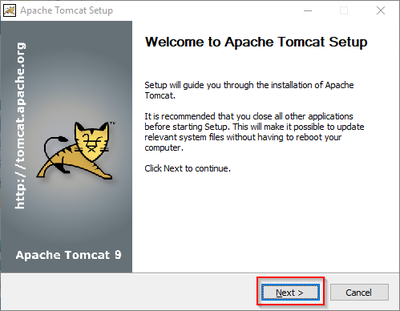
Open the downloaded file "apache-tomcat-9.0.16.exe".
Start the installation by clicking "Next >":
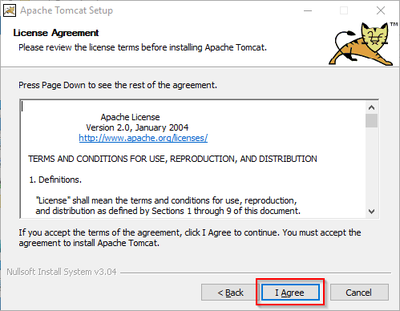
Confirm the license agreement by clicking "I Agree":
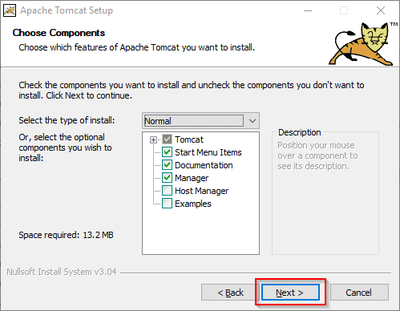
Click "Next >":
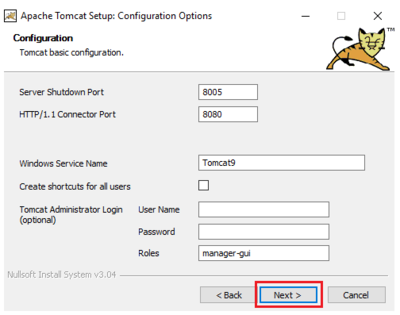
Click "Next >" again:
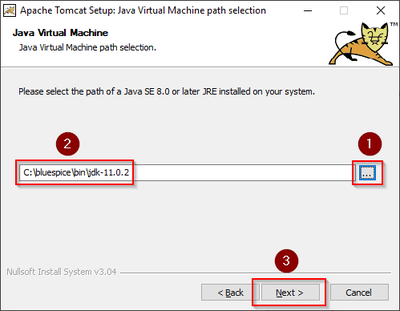
Wählen (1) Sie das Home-Verzeichnis Ihrer OpenJDK-Installation (2) aus und klicken auf "Next >" (3):
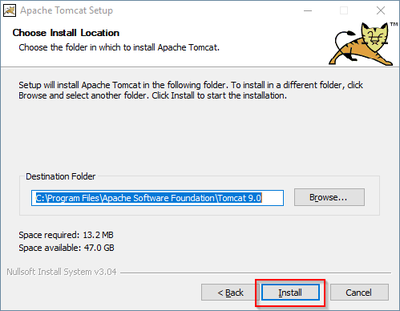
Starten Sie jetzt die Installation von Tomcat:
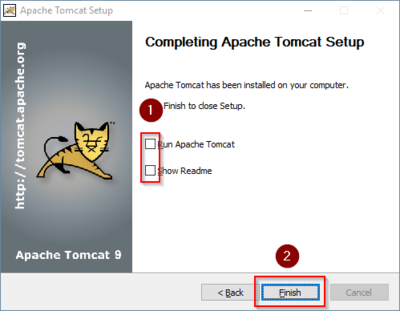
Am Ende der Installation wählen Sie beide vorselektierten Haken ab (1) und beenden das Setup (2)
Konfiguration von Apache Tomcat
Wechseln Sie in das Installationsverzeichnis von Tomcat. Standardmäßig finden Sie dies unter C:\Program Files\Apache Software Foundation\Tomcat 9.0\conf.
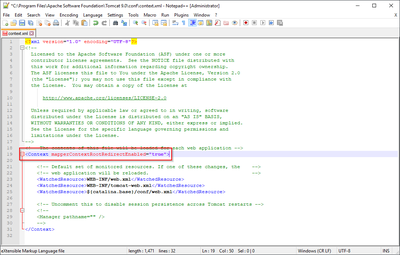
Öffnen Sie hier die Datei context.xml in einem Texteditor und ersetzen Sie die einmal vorkommende Zeile
<Context>
durch
<Context mapperContextRootRedirectEnabled="true">
Speichern und schließen Sie die Datei.
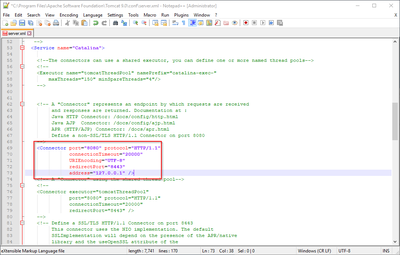
Öffnen Sie im selben Verzeichnis die Datei server.xml in einem Texteditor und stellen sicher, dass der komplette Block
<Connector port="8080" protocol="HTTP/1.1"
	... />
wie folgt lautet:
<Connector port="8080" protocol="HTTP/1.1"
	connectionTimeout="20000"
	URIEncoding="UTF-8"
	redirectPort="8443"
	address="127.0.0.1" />
Speichern und schließen Sie die Datei.
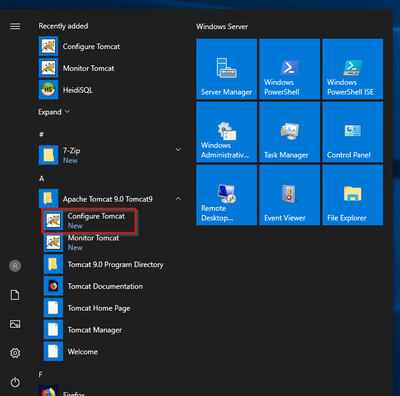
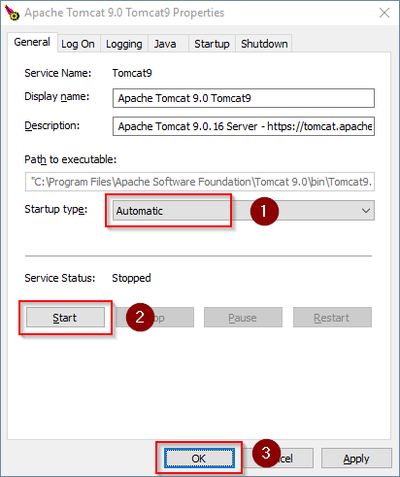
Suchen Sie im Startmenü den Eintrag "Configure Tomcat" und öffnen diesen:
Stellen Sie den "Startup type" auf "Automatic" (1) und starten Tomcat (2). Anschließend Beenden Sie die Konfigurations-Konsole (3):
Überprüfen der Installation
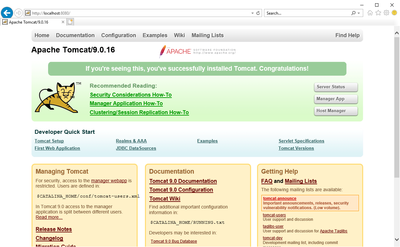
Zur Überprüfung, ob Tomcat korrekt läuft öffnen Sie in einem Browser auf dem Server die Adresse http://localhost:8080/.
Sie sollten nun die Startseite des Tomcat-Servers angezeigt bekommen:
Installation der Webapps
Nach erfolgreicher Installation von BlueSpice befolgen Sie bitte folgende weitere Schritte zur Installation der Webservices und Aktivierung der jeweiligen BlueSpice-Erweiterung:
- PDF-Export
- VisualDiff (nur BlueSpice pro)
- LatexRenderer (nur BlueSpice pro)
Nächster Schritt
Haben Sie alle Schritte erfolgreich abgeschlossen können Sie die zuvor heruntergeladene Datei "apache-tomcat-9.0.16.exe" von Ihrer Festplatte löschen und zum nächsten Schritt "Elasticsearch" weiter gehen.

